How to Test a Car Battery After Sitting Overnight: Practical Guide
Let the car sit overnight, then measure resting voltage with a multimeter before starting. If voltage is low, follow with a load test and check the charging system.
If you want to know how to test a car battery after sitting overnight, the key is to measure resting voltage before starting the engine. An overnight sit removes surface charge and gives you a much more honest reading of what the battery can actually do.
Many batteries fail quietly after a cold night, not right after a drive. This guide walks you through the tools, safety steps, and test methods you can use at home, plus when it makes sense to call a professional.
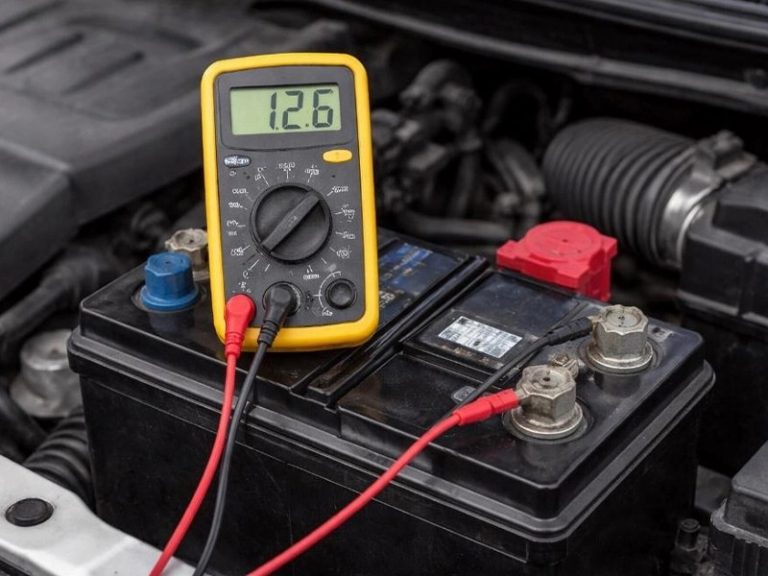
- Resting voltage first: After an overnight sit, a fully charged 12V battery should read around 12.6 volts.
- Load test confirms: A multimeter alone can’t prove battery health; use a load or conductance tester.
- Safety matters: Wear eye protection, work in a ventilated area, and stop if the battery case.
- Check charging system: With engine running, voltage should rise to about 13.8–14.5 volts.
- Not sure? If your battery keeps dying, a professional parasitic-draw test may be needed.
Why an Overnight Sit Is the Real Battery Test
A car battery builds up a surface charge whenever the engine runs or a charger has been connected. That charge can make voltage look higher than the battery’s true state of charge. After the car sits overnight, that surface charge fades, leaving what technicians call resting voltage.
Testing after an overnight sit is useful because it matches the real-world moment when most drivers face a no-start: cold morning, engine off, battery under stress. If you have ever walked out to a dead battery after the car sat overnight, you know the pattern. Common causes include a weak battery, a failing alternator, or a parasitic draw. You can dig deeper into those causes in our guide on why a car battery dies after sitting overnight.
Safety First: Tools, Connection Order, and Stop Conditions
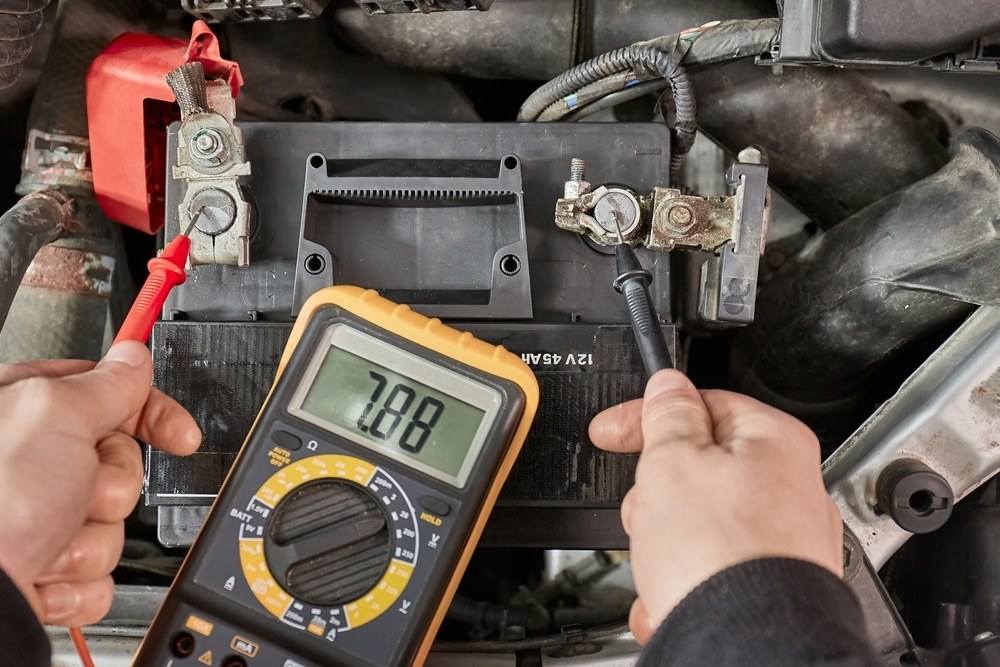
Car batteries store a lot of energy and contain sulfuric acid. They can produce explosive hydrogen gas. A few basic habits make testing safe.
Essential Tools for Battery Testing
- Digital multimeter with DC voltage setting
- Battery load tester or conductance tester
- Safety glasses and acid-resistant gloves
- Wire brush or battery terminal cleaner
- Baking soda and water solution for cleaning corrosion
- Owner’s manual for your specific vehicle
You do not need a shop full of tools to get started. A decent multimeter is affordable and widely available. For a stronger health check, a dedicated battery tester gives more useful information.
Correct Connection Order and Safety Rules
When measuring voltage, connect the red meter lead to the positive battery terminal first. Then connect the black lead to the negative terminal. Keep the leads from touching each other while connected.
Work in a well-ventilated area. Remove metal jewelry like rings or bracelets. Do not smoke or create sparks near the battery. If you remove the battery later, disconnect the negative terminal first, then the positive. Install in the reverse order: positive first, negative last.
Damaged Battery Stop Conditions and Hybrid/EV Cautions
Stop testing immediately if you see a cracked case, swollen sides, leaking fluid, damaged terminals, or a strong rotten-egg sulfur smell. A damaged battery can leak acid or short circuit. Do not charge, jump, or load-test it.
Step-by-Step: How to Test a Car Battery After Sitting Overnight
Follow these steps in order. They give you a clear picture of voltage, battery health, and charging output.
Step 1: Measure Resting Voltage with a Multimeter
- Make sure the car is off and all lights, doors, and accessories are closed.
- Open the hood and locate the battery. Clean the top of the battery if needed so you can see the terminals clearly.
- Set the multimeter to DC voltage, usually the 20V range.
- Connect the red lead to the positive terminal, black lead to the negative terminal.
- Read the voltage after the number stabilizes, usually within a few seconds.
A fully charged 12V battery should read around 12.6 volts after sitting overnight. If you are new to multimeters, our guide on testing a battery with a multimeter explains the settings and readings in more detail.
Step 2: Perform a Load Test to Confirm Battery Health
Resting voltage tells you state of charge, but it does not prove the battery can deliver cranking amps. A battery can show 12.6 volts and still fail under the load of starting the engine.
A load tester applies a controlled electrical load for a short time while watching voltage. A conductance tester measures internal resistance and estimates state of health. Most testers have a pass/fail result based on the battery’s CCA rating and temperature. A dedicated tester gives a clearer answer; learn how to test a battery with a battery tester for the full process.
If you do not own a tester, many auto parts stores offer free battery testing. Call ahead and ask about their current testing service before driving over.
Step 3: Check Cranking Ampsand Charging System Output
Compare the tester’s measured cranking amps to the CCA rating printed on the battery label. If measured capacity is well below the rating, the battery is aging even if it still starts the car.
Then check the charging system. Start the engine and measure voltage at the battery terminals with the engine running. A healthy alternator usually produces around 13.8 to 14.5 volts at idle. Below 13 volts may mean a weak alternator; above 15 volts may mean overcharging. Both can damage a battery over time.
Decoding Voltage Readings: State of Charge vs. Battery Health
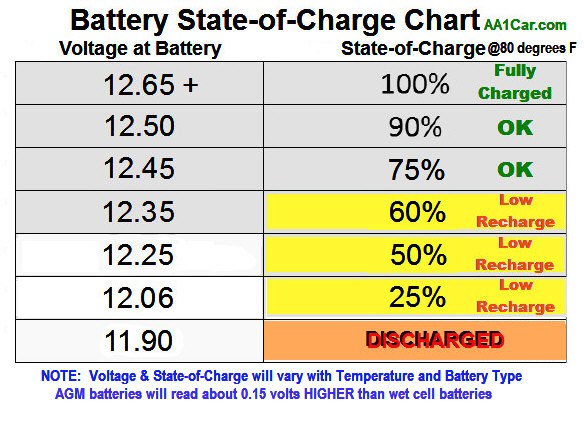
Voltage readings are easy to misinterpret. A high resting voltage does not always mean a healthy battery, and a lower voltage does not always mean the battery is dead.
Voltage Thresholds by Battery Chemistry(Flooded, AGM, EFB)
Most standard lead-acid batteries are flooded. A fully charged flooded battery rests around 12.6 volts. At about 12.4 volts, it is around 75% charged. At 12.2 volts, it is closer to 50%. Below 12.0 volts, it is weak or significantly discharged.
AGM and EFB batteries can rest slightly higher, often around 12.8 volts when fully charged. Always check the label or owner’s manual for the exact voltage specification. A low state of health reading on a battery tester can also flag a battery that is losing capacity even when voltage looks normal.
Temperature Effects and Surface Charge vs. Resting Voltage
Cold weather slows the chemical reaction inside a battery. That means a weak battery may crank slowly on a 20°F morning even if its resting voltage looks acceptable at 70°F. Temperature matters most during the load test, because many testers adjust the passing limit based on battery temperature.
Surface charge is another trap. If you drive, charge, or even open and close the door for a while, voltage can read artificially high. Letting the car sit overnight is the simplest way to remove surface charge. If you cannot wait, some testers have a function to remove surface charge, or you can turn on the headlights for a few minutes before testing, but overnight is more reliable.
Hydrometer Testing for Non-Sealed Batteries: How to Use It and What Readings Mean
If your battery has removable caps on top, it is a non-sealed flooded battery. A hydrometer measures the specific gravity of the electrolyte, which tells you how charged each cell is. This test is not for sealed AGM, EFB, or gel batteries.
To use a hydrometer:
- Wear safety glasses and gloves.
- Remove the vent caps carefully.
- Squeeze the bulb, insert the tube into a cell, and draw up enough electrolyte to make the float rise.
- Hold the hydrometer level and read the number at the surface of the liquid.
- Repeat for each cell you can safely reach.
A specific gravity reading around 1.265 or higher generally means a fully charged cell. Around 1.225 suggests about 75% charge. Below 1.200 means the cell is weak. If one cell reads much lower than the others, the battery may have an internal problem and should be replaced.
Do not add water just before testing, because that dilutes the electrolyte and gives a false low reading. Test first, then top off with distilled water only if needed and the manufacturer allows it.
When DIY Testing Isn’t Enough: OBD2 Diagnostics and Professional Help
Sometimes the battery tests fine, but the car still dies. That is when you need to look beyond the battery itself.
OBD2 Port Location, Ignition Mode,and Model-Year Protocol Coverage
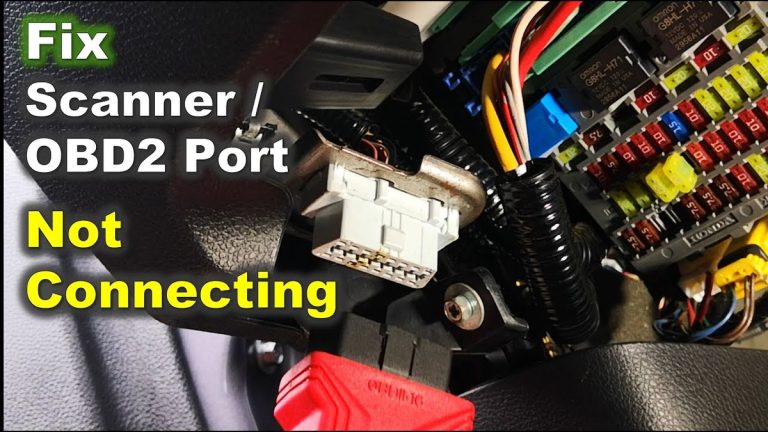
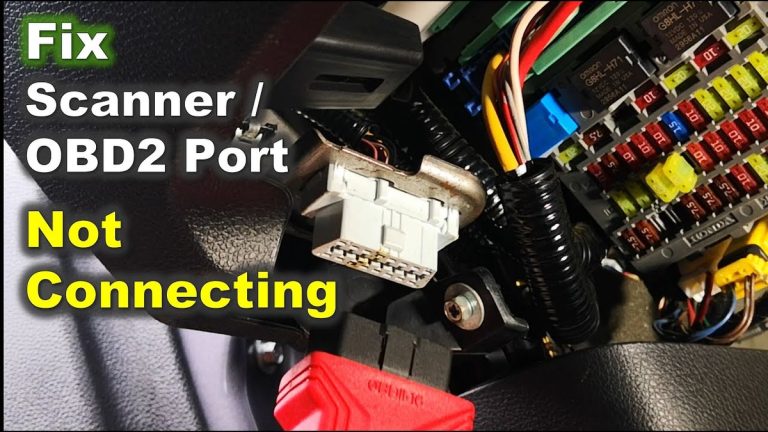
Most 1996 and newer gasoline cars and light trucks in the US have an OBD2 port. It is usually under the dashboard on the driver’s side, near the hood release or steering column. To read codes, turn the ignition to the “on” position without starting the engine. Some hybrids and EVs may place the port differently or need special adapters.
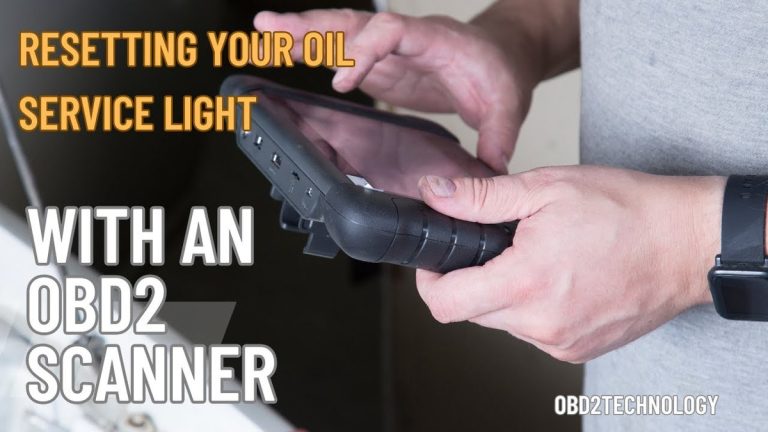
An OBD2 scanner can read engine, transmission, and emissions-related codes. It can also show live data like alternator output through the charging system sensors. If you need help finding live data, our guide on using an OBD2 scanner for live data covers the basics.
Code Limits, Live Data, Emissions Readiness,and Reset Limitations
A basic OBD2 scanner cannot measure battery cranking amps or internal resistance. It also cannot tell you if a battery has a bad cell. For that, you still need a battery tester.
If you clear diagnostic trouble codes, the scanner also resets emissions readiness monitors. That can cause an emissions test to fail until you complete a drive cycle. Do not clear codes before recording them or before you finish diagnosing the problem.
App Permissions, Firmware,and Battery Registration Constraints
Bluetooth OBD2 scanners often require a smartphone app. Before buying, check what app permissions the app asks for, whether firmware updates are free, and whether the scanner supports your vehicle’s protocol. Some apps collect vehicle data, so review the privacy policy if that matters to you.
Some newer European vehicles require a battery registration procedure after replacing the battery. A basic OBD2 scanner usually cannot perform that. You may need a professional scan tool or a trip to a shop.
When to Call a Professional: Parasitic Draws and Advanced Diagnostics
If your battery tests good, the charging system output looks normal, but the battery still dies after sitting overnight, you likely have a parasitic draw. That is a component draining power while the car is off. Finding it requires an ammeter test and a methodical process of pulling fuses.
A professional can also test the starter, alternator diodes, and battery management system. If you have already seen a good battery test but still have failures, our article on why a car battery tests good but still dies explains likely causes and next steps.
Maintenance Tips to Extend Battery Life After Testing
Once you confirm the battery is healthy, a little maintenance can add months or years to its life.
Cleaning Terminals, Securing the Battery,and Preventing Corrosion
Corrosion on terminals can look like a white or blue crusty powder. It adds resistance and can make a good battery fail to start. Clean the terminals with a wire brush and a baking soda-water solution, then rinse with clean water and dry thoroughly.
Make sure the battery is held down tightly by its bracket or hold-down. A loose battery can vibrate, crack the case, and damage internal plates. After cleaning, tighten the connections snugly, but do not overtighten the terminal bolts.
Driving Habits, Charging System Health,and Seasonal Care
Short trips can leave a battery undercharged, especially in winter when headlights, defrosters, and seat heaters draw more power. If you mostly drive short distances, use a smart battery charger occasionally to top off the battery.
Extreme heat and cold both shorten battery life. In summer, heat speeds up internal corrosion. In winter, cold makes starting harder. Keep the battery fully charged before a cold snap, and have the charging system tested if you notice dim headlights or slow cranking.
Common Testing Mistakes and Next Steps for a Weak Battery
Even experienced DIYers make mistakes when testing batteries. Knowing what to avoid helps you trust your results.
Testing Too Soon After Driving or Ignoring Surface Charge
Testing right after a drive is the most common mistake. Surface charge makes the voltage look higher than the true state of charge, so you might think the battery is fine when it is actually weak. Always let the car sit overnight, or at least several hours, before measuring resting voltage.
Another mistake is using only voltage to judge battery health. A battery with a bad cell can still show decent voltage at rest, but fail under load. Always follow a resting voltage check with a load test or conductance test.
- Let the car sit overnight before testing resting voltage
- Use safety glasses and work in a ventilated area
- Compare readings to the battery’s CCA rating and temperature
- Check the charging system output with the engine running
- Test a cracked, swollen, or leaking battery
- Trust a multimeter alone for battery health
- Clear OBD2 codes before recording them
- Ignore a battery that tests good but still dies overnight
Next Steps: Charge, Replace, or Call a Pro
If resting voltage is low but the load test passes, charge the battery fully with a smart charger and retest. If the load test fails, replacement is usually the safest and most reliable fix. Battery life varies by climate, driving habits, and vehicle, but most batteries last roughly three to five years.
If you need a temporary jump while you sort out the battery, choose a jump starter that matches your vehicle’s engine size and battery type. Our guide on choosing a jump starter for your car can help you avoid buying one with too little power. And if you are unsure about any reading, a professional battery test is inexpensive compared to the cost of a tow or a damaged electrical system.
- Best for: Drivers who want a reliable, low-cost way to check battery health before a cold morning leaves them stranded.
- Think twice if: You have a hybrid or EV with high-voltage components, or if the battery case is damaged; those situations need professional help.
- Next step: Let your car sit overnight, measure resting voltage with a multimeter, then follow with a load test before deciding to replace the battery.
Frequently Asked Questions
Let the car sit overnight, or at least 8 to 12 hours, before measuring resting voltage. This gives surface charge time to fade and provides a more honest reading of the battery’s state of charge.
Yes, a multimeter can measure resting voltage, but it cannot measure cranking capacity or internal resistance. For a full health check, use a battery load tester or conductance tester, or have a professional test the battery.
A fully charged flooded 12V battery usually reads around 12.6 volts. Around 12.4 volts is about 75% charged, and below 12.0 volts means the battery is weak or significantly discharged.
It is safe, but the reading will not be accurate. Surface charge from driving makes voltage appear higher than the true state of charge. Wait overnight or remove surface charge before testing.
Not for the battery itself. OBD2 scanners can read charging system codes and live data, but battery health requires a battery tester or multimeter. Use OBD2 for related electrical and engine diagnostics.
Charge the battery fully and retest it. If it still fails, replace the battery or have a professional checkthe charging system and parasitic draw. A failing load test usually means the battery cannot deliver enough cranking power.