How to Check Tire Pressure at Home and Avoid a TPMS Warning
Check tire pressure at home in minutes with a dependable gauge, the cold pressure from your door placard, and a quick check of every valve stem. A monthly cold reading keeps the TPMS light off and catches slow leaks before they cost you a tire.
Knowing how to check tire pressure at home is one of the most useful car-care skills a driver can pick up. It takes about two minutes per wheel, needs only a basic gauge, and can keep an unexpected TPMS warning from lighting up your dash during a busy commute. This guide covers the correct pressure source, a simple step-by-step routine, which gauge style fits your needs, and what to do when the warning light refuses to go away.
- Use the placard, not the sidewall: The door-jamb sticker lists the correct cold PSI; the sidewall number is the maximum.
- Check cold: Measure before driving or at least three hours after the car has been parked.
- Gauge type matters: Digital gauges are easy to read; analog pencil gauges are cheap; inflator gauges are.
- TPMS has limits: The warning usually appears at about 25% below placard pressure, so it won’t catch.
- Know repair limits: Plugs are temporary; punctures in the sidewall or shoulder usually require professional repair or.
Why Checking Tire Pressure at Home Matters and What the TPMS Warning Really Tells You
Tires lose air naturally. Over a month, a healthy tire can drop a few psi, and cold weather makes it worse: pressure falls about 1 psi for every 10°F drop in air temperature. If you rely only on the dashboard warning, you may not learn about a problem until the tire is already well under its target pressure.
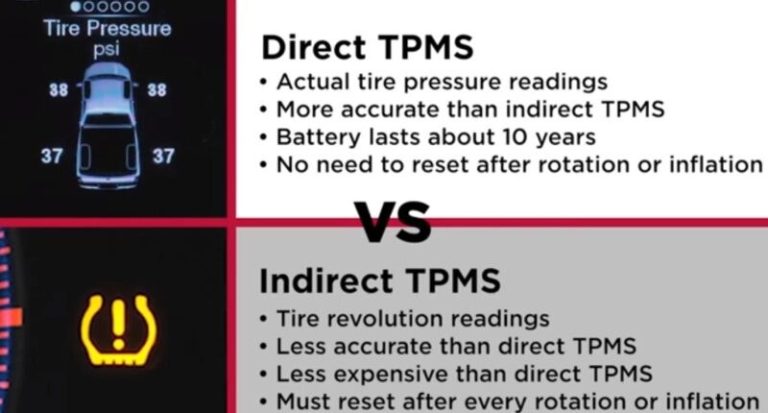
National Highway Traffic Safety Administration rules require the TPMS warning to turn on when pressure falls 25 percent or more below the manufacturer’s recommended cold pressure. That means the light is a late indicator, not an early one. By the time it appears, the tire has been running underinflated for a while. Underinflated tires flex more, build heat, and raise the risk of a blowout on long drives.
Home checks catch slow leaks and gradual seasonal pressure drops before they cross that threshold. They also help you notice a tire that loses air faster than its siblings, which is often the first clue that a nail or a faulty valve stem is on the scene.
Find the Correct Pressure: Door-Jamb Placard vs. Tire Sidewall
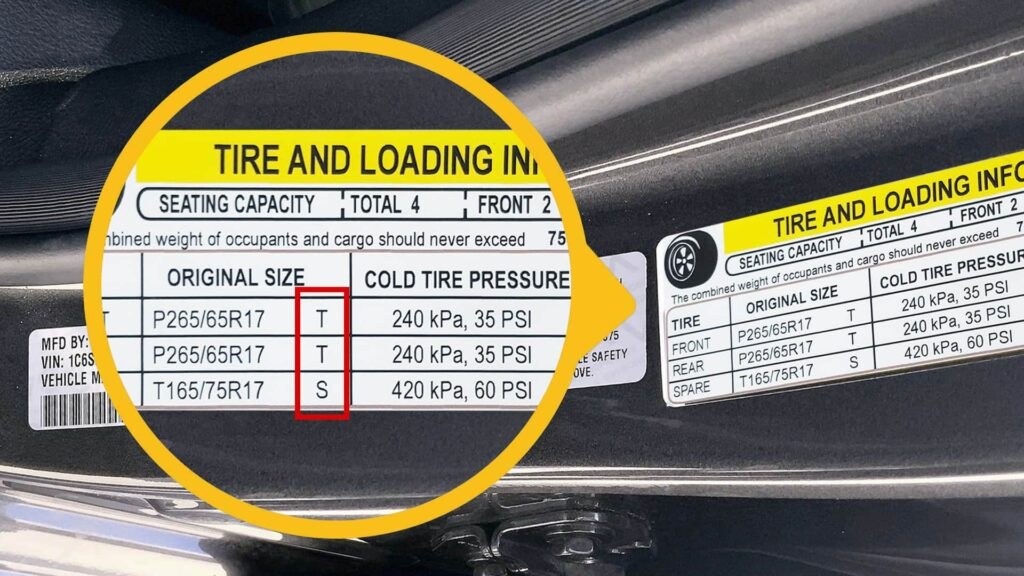
Every vehicle has a recommended cold tire pressure, and it is printed on the placard. Look for the sticker on the driver’s side door jamb, inside the fuel door, or in the owner’s manual. Many vehicles list different pressures for the front and rear, and some list a higher pressure for heavy loads.
The tire sidewall also shows a pressure number, but that number is the maximum cold pressure for the tire, not the setting for your car. Filling to the sidewall value can make the ride stiff, reduce grip in wet conditions, and cause the center of the tread to wear first.
If the vehicle has aftermarket tires or different wheel sizes, keep the placard as your starting point and confirm the correct setting with the tire shop or owner’s manual. When the placard and sidewall disagree, the placard wins for normal driving.
How to Check Tire Pressure at Home: A Step-by-Step Guide
Start with cold tires. Cold means the car has been parked for about three hours or driven less than a mile. Warm tires read higher, so checking after a long drive will give you a misleading number. If you drove home and then remembered the check, let the tires cool before setting the final pressure. Our guide on how long to wait after driving covers the timing in more detail.
Park for at least three hours or check before the first drive. Read the placard pressure for front and rear tires and write it down.
Push the gauge straight onto the valve stem with enough pressure to form a seal. A hissing sound means the gauge is not seated, so adjust and press again.
Write down each reading. If the number is below the placard, add air. If it is above, bleed air by pressing the small pin inside the valve stem.
After inflating, measure again to confirm the target. Tighten every valve cap by hand to keep dirt and moisture out.
Don’t judge pressure by how the tire looks. Many modern tires have stiff sidewalls that look normal even when they are several psi low. The gauge is the only reliable judge.
Choosing the Right Tire Gauge: Analog, Digital, or Inflator Gauge
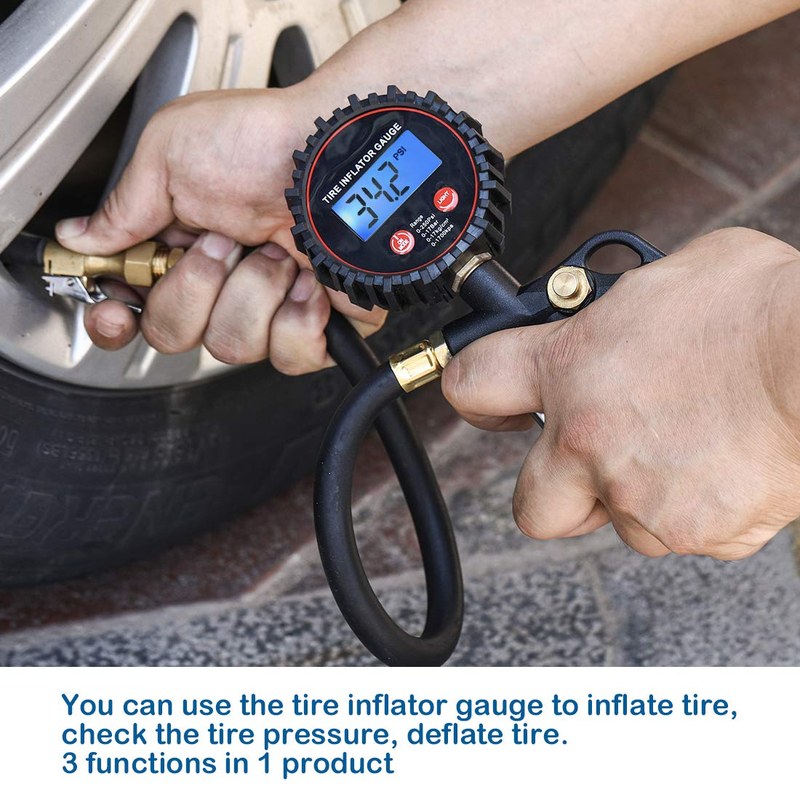
The best gauge is the one you will actually reach for. All three styles can work for home pressure checks, but they differ in price, readability, and convenience. For a closer look at the trade-offs, see our comparison of digital versus analog tire pressure gauges.
Analog Pencil and Dial Gauges
Pencil gauges are small, inexpensive, and easy to tuck into a door pocket. Dial gauges offer a larger face with a needle that holds the reading until you press the release. Neither style needs a battery, but both can be awkward to read in dim light, and inexpensive examples may not give repeatable readings check after check.
Digital Gauges
Digital gauges display pressure in tenths of a psi on an LCD screen, often with a backlight. They are the easiest to read at dawn or in a dark garage, but they run on small watch-style batteries. Some models let you switch between psi, bar, and kPa, which helps when you are using an unfamiliar inflator.
Inflator and Built-In Compressor Gauges
Portable inflators and home compressors include built-in gauges, so one tool can top off a tire without a separate gauge. The convenience comes with a trade-off: built-in gauges are not always consistent with a standalone gauge. Use the built-in reading as a rough guide, then confirm the final number with your handheld gauge before putting the valve cap back on.
| Gauge type | Best for | Owner consideration | Driver consideration |
|---|---|---|---|
| Analog pencil or dial | Quick budget checks and glovebox backups | Low upfront cost, no battery to replace | Small print and moving needles are hard to read in low light |
| Digital | Clear repeated readings at home | Watch-style button batteries need occasional replacement | Backlit screens make checking easier at dusk or in a garage |
| Inflator built-in gauge | Topping off after a cold check | One tool inflates and measures, but the gauge may read differently | Cross-check with a standalone gauge before trusting the number |
How to Inflate Tires at Home Without Overinflating
Write the target pressure on a sticky note or set it on your phone before you start. If your goal is 35 psi, don’t aim by feel. Add air in short bursts, then check between bursts. A few seconds of run time can change the pressure on a typical car tire by more than you expect.
If you overshoot, press the small pin in the center of the valve stem to release a little air, then recheck. Repeat until the reading is at or slightly below the placard number.
Portable Inflator Duty Cycle and Limitations
Every portable inflator has a duty cycle: the manufacturer’s rated run time before it needs to cool down. Run a compact 12V inflator beyond that limit and it can overheat, slow down, or shut off in the middle of a tire. Open your unit’s manual and note the rated run and rest times before you start.
Gas Station Inflator Tips
Station inflators are useful on the road, but check the display unit before you start. If it is set to bar or kPa instead of psi, you can easily overfill without realizing it.
Use the preset function when the machine has one, set it to your placard number, and let it stop automatically. Coin-operated machines may give you a limited window, so work one tire at a time and keep your target pressure written down.
When the TPMS Warning Stays On: Relearn Limits and Reset Limitations
Adding air does not always switch the light off immediately. Direct TPMS sensors send updated readings after a few minutes of driving, so the warning can remain for a short trip. Indirect systems that use wheel-speed sensors often need a manual reset from the dashboard menu after you fix the pressure.
Some vehicles require a relearn procedure when a sensor is replaced, when tires are rotated, or when a spare has its own sensor. Steps vary widely by make and model, so the owner’s manual is the right first stop. If you recently rotated the tires, we have a guide on how to reset the TPMS light after a tire rotation.
A flashing TPMS light usually points to a sensor fault rather than a low tire. The tire may be fine, but the system cannot report pressure, so have the sensor checked. Clearing or ignoring the light without fixing the cause just puts the problem back on you later.
Puncture Location, Temporary Repairs, and Professional Repair Thresholds
If a tire keeps losing pressure, check the tread for a nail, screw, or other debris. A small puncture in the center tread can often be repaired professionally, but a plug pushed in from the outside is a temporary fix, not a final one.
Tire shops usually follow industry repair guidelines that treat sidewall and shoulder punctures as unrepairable because those areas flex under load. Holes larger than about 1/4 inch are also borderline, and many technicians will refuse a repair rather than risk a failure. Since shop policies vary, a trained technician should make the final call. To understand how far you can push a plug, our article on how many tire plugs you can put in one tire explains the limits.
And if a tire is severely worn or damaged, a correct pressure reading will not save it. The number is only as useful as the tire holding it.
How Often to Check Tire Pressure at Home and the Cost of Skipping It
Build a monthly pressure check into your routine. You can tie it to the first day of the month, a payday, or an oil change. Add an extra check before a long road trip and after a sharp temperature swing.
Underinflated tires wear faster on the outer edges, shorten tire life, and can reduce fuel economy through higher rolling resistance. Uneven wear can also complicate wheel balancing, and some tire warranties ask for proof of proper maintenance when you file a claim.
A gauge costs far less than the tires it can protect, and it never expires. Keep one gauge in the passenger compartment so it is easy to reach, and stash a spare in the other car if you have one.
- Best for: Drivers who want to catch slow leaks, uneven wear, and seasonal pressure swings before the TPMS light takes over.
- Think twice if: You expect a home gauge or inflator to be lab-accurate — treat its reading as a close reference, not a calibration standard.
- Next step: Find your placard PSI, pick a gauge that is comfortable to read, and set a monthly reminder for a cold-tire check.
Frequently Asked Questions
Use the cold tire pressure listed on the driver-side door-jamb placard or in the owner’s manual. The number molded into the tire sidewall is the maximum pressure for that tire, not the recommended setting for your vehicle.
Tires heat up as you drive, and warm tires read higher than cold ones. Wait about three hours after driving, or check before your first trip of the day, for a reading you can trust.
Digital gauges are the easiest to read and show tenths of a psi. Analog pencil and dial gauges are inexpensive and battery-free but can be harder to read. An inflator with a built-in gauge is convenient for topping off, but cross-check its reading with a separate gauge.
Many vehicles require a few minutes of driving to refresh sensor readings, and some need a manual reset or relearn procedure. If the light flashes, a sensor fault is more likely, so check the owner’s manual or have the system inspected.
A plug is a temporary repair and should be followed by a professional patch-plug install from inside the tire. Sidewall and shoulder punctures, or holes larger than about 1/4 inch, generally require tire replacement.
Check cold tire pressure about once a month, before long trips, and after large temperature swings. Tire pressure drops roughly 1 psi for every 10 degrees Fahrenheit drop in air temperature.