Why Does a Tire Keep Losing Pressure After a Repair? Common Causes
A repaired tire that keeps losing air usually has a failed repair seal, a bead or valve leak, or a second puncture. Find the exact leak point with a cold-pressure check and soapy-water test before deciding on another repair or replacement.
If you have been asking why does a tire keep losing pressure after a repair, you are not alone — and the answer may not be the repair itself. A repaired tire that drops several PSI within days usually means either the repair did not fully seal, the puncture was in a non-repairable zone, or a separate leak went unnoticed during service.
You do not have to guess, and you do not have to keep paying for repeat shop visits. With a tire pressure gauge, some soapy water, and a basic understanding of how tire repairs work, you can track down the actual leak and decide whether another repair makes sense — or whether the tire simply needs to be replaced.
- Root cause: Post-repair leaks mean the repair did not seal, or another leak exists in the.
- Diagnose first: Use the door-jamb placard, a consistent gauge, and a soapy-water test to pinpoint the.
- Repair limits: Sidewall and shoulder damage, punctures over about 1/4 inch, and heavily worn tires should.
- TPMS limits: The warning light alerts late and cannot locate a leak, so regular cold-pressure checks.
The Quick Answer: The Repair Didn’t Fully Seal, or a Second Leak Exists
Two main possibilities exist when a repaired tire continues to lose air. First, the repair itself did not create a complete seal against the inner liner. Second, the tire, wheel, or valve has another leak that was missed during the original service.
Tires can also leak at the bead where the rubber meets the rim, at a cracked valve stem, or through a damaged TPMS sensor seal. The only way to know for sure is to find the exact leak point rather than topping off the air and hoping for the best.
6 Common Reasons a Repaired Tire Still Loses Air
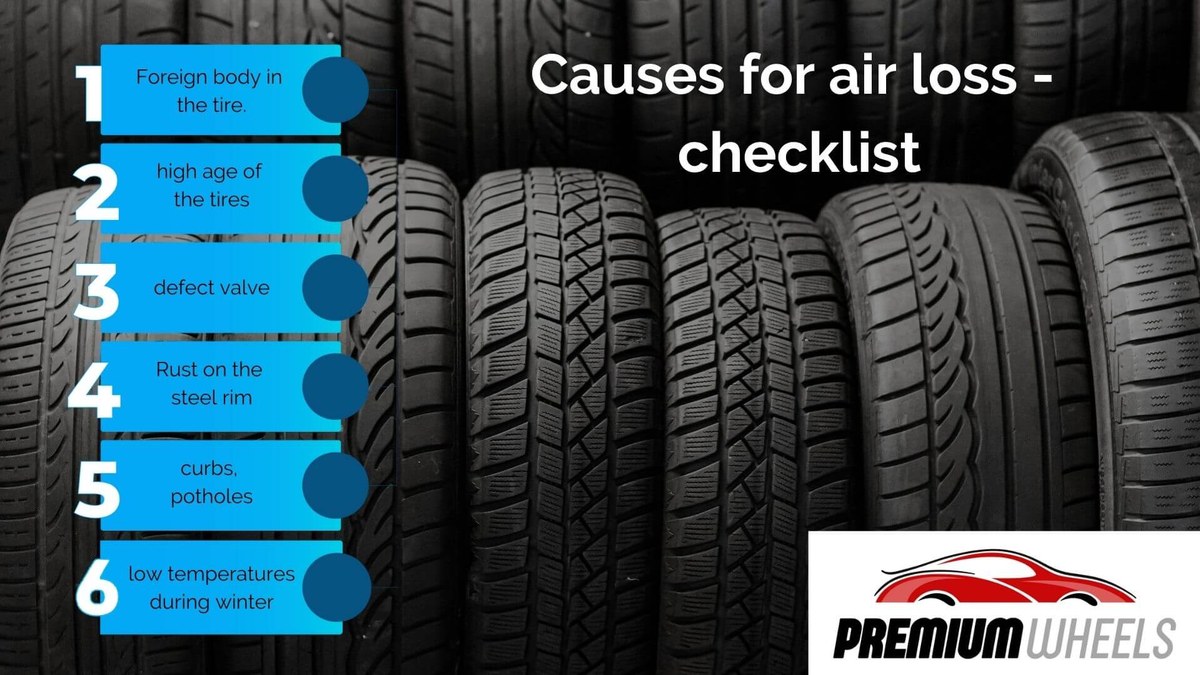
These six causes account for nearly every post-repair pressure complaint. Some are repair-quality problems. Others are separate failures that simply appeared around the same time as the puncture.
Plug-Only Repairs That Fail to Seal the Inner Liner
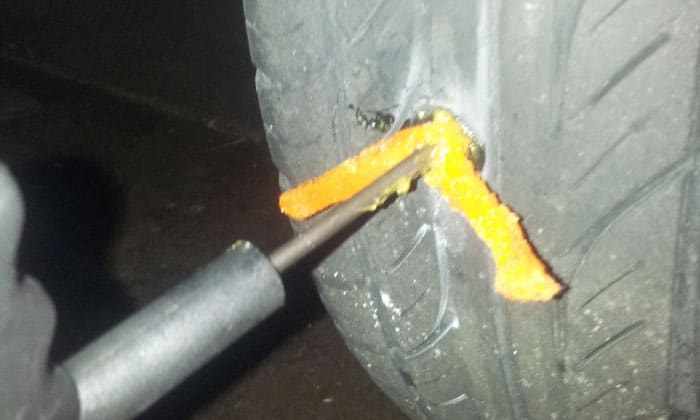
Plug-only repairs are pushed into the puncture from the outside of the tire. They are fast and inexpensive, but they do not always seal the inner liner — the rubber layer that actually holds the air.
If the plug does not bond correctly, air seeps around the plug itself and the leak returns within days. Tire industry professionals generally consider a patch-plug combination the proper permanent repair. A plug alone is seen as a temporary option for getting you back on the road safely.
Puncture Location: Sidewall and Shoulder Damage
The sidewall and shoulder flex constantly as the tire rolls. That flexing makes it nearly impossible for a plug or patch to hold a reliable seal over a puncture in those zones.
Tire industry repair standards generally treat sidewall and shoulder punctures as non-repairable. If a technician repaired a puncture in this area, the repair is likely to fail quickly. If you are not sure whether your damage falls into this zone, our guide explains why sidewall punctures are off-limits for plug kits.
Bead Leaks From Corroded or Bent Wheel Rims
The bead is the rim-ward edge of the tire. Even a flawless patch cannot hold pressure if the bead-to-rim seal is leaking.
Corrosion on steel rims, bent edges on alloy wheels, or an old rubber bead seal can all let air escape slowly. These leaks often appear only after the tire is remounted, which is why the problem can begin on the exact day of your repair.
A shop should clean and inspect the bead seat, apply fresh bead sealer when needed, and tell you if the wheel itself is damaged. If the rim is bent or cracked, the fix is wheel service or replacement — not another tire repair.
Valve Stem and TPMS Sensor Leaks
The valve stem is a rubber component that gets flexed and pulled every time the tire is serviced. A cracked stem or a loose valve core is one of the most common slow-leak causes after a repair.
TPMS sensors sit inside the pressurized wheel, and their rubber grommets and metal cores can leak too. Tire service can shift or nick those seals. If your tire service included sensor work, check whether the sensor needs to be programmed after replacement before you drive away.
A Second Puncture or Nail Missed During the First Repair
Finding one nail is easy. Finding the second nail is what separates a careful inspection from a rushed one.
If a tire still loses pressure after a repair, the remaining leak could be a second puncture in a different tread groove. The original repair may be holding perfectly while another object works its way deeper into the rubber. That is why a leak test of the whole tire matters so much.
Contamination or Improper Mounting During Installation
Repair materials require a clean surface. Moisture, oil, old tire sealant, or dust on the inner liner can prevent a patch from bonding, which causes the repair to leak within days.
Mounting mistakes can also cause damage. A pinched bead, a scratched rim edge, or a tire iron that slices the inner liner are all possible during removal and installation. These problems are not caused by a defective tire or a faulty patch, and they are not visible once the wheel is back on the car.
How to Diagnose the Leak Yourself Before Going Back to the Shop
You can perform a simple, safe check at home in about fifteen minutes. The goal is to find the exact leak point so the shop cannot guess, and so you do not pay for work you do not need.
Check Cold Tire Pressure Against the Door-Jamb Placard
The manufacturer set your vehicle’s recommended cold pressure on the placard on the driver’s door jamb. That is the number to compare against, not the number molded on the sidewall.
The sidewall number is the maximum pressure the tire can carry, not the daily driving target. “Cold” means the car has been parked for several hours. If you just drove home from work, wait until the next morning to measure before making any judgement.
Use an Accurate Gauge and Test It for Consistency
An inconsistent gauge can make a perfectly healthy tire look like it has a leak. Digital and analog gauges both drift over time, and low battery levels can cause unreliable digital readings.
Test the gauge by checking one tire twice in a row. If the readings differ by more than a pound, the gauge is not reliable for this job. Once you trust the gauge, write down the reading and the date so you can track whether the pressure is actually dropping.
The Soapy Water Test: Locating the Exact Leak Point
Spray a mix of dish soap and water over the valve stem, the repair site, the bead line, and the entire tread. Watch for bubbles that keep growing or new bubbles appearing in one spot.
Bubbles forming at the repair site tell you the repair seal failed. Bubbles at the rim edge point to a bead leak. Bubbles at the valve stem point to a cracked stem or loose core. Mark the spot with chalk so the technician can find it without redoing the whole inspection.
When You Need a Shop’s Dunk Tank or Spin Diagnostic
Very slow leaks are sometimes too small for soapy water to reveal on a parked tire. A shop can remove the tire, pressurize it slightly, and lower it into a water tank where even tiny bubbles become visible.
Spin diagnostics place the tire under load and rotation to expose leaks that only appear while the tire is flexing. If you cannot find the leak at home and the tire drops several PSI a day, take it in. A shop that finds the leak before quoting a repair is the shop you want.
What Your TPMS Can and Cannot Tell You After a Repair
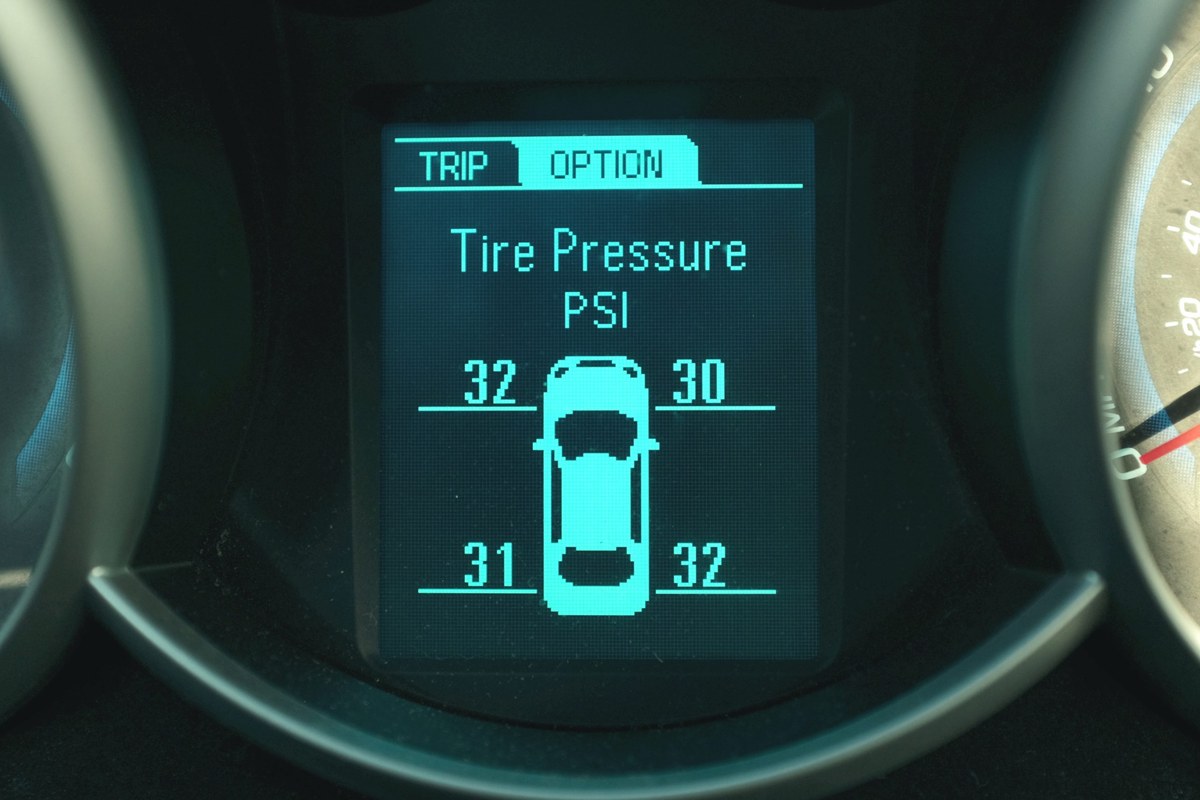
The tire pressure monitoring system is a safety alert, not a diagnostic tool. It tells you when pressure is low, but it does not tell you where the leak is or why the repair failed.
Door-Jamb Placard vs. Sidewall Pressure Ratings
As covered earlier, the placard pressure is your daily target. The sidewall maximum pressure applies only in specific heavy-load situations defined by the tire manufacturer.
If the TPMS threshold was set for a previous tire size, or if the sensors were never programmed after new wheels were installed, the warning light may behave differently. Check your owner’s manual for the recommended pressure and the reset procedure for your exact trim.
TPMS Relearn Limits and Sensor Battery Life
Most vehicles require a relearn after a tire rotation, wheel replacement, or sensor swap so the system knows where each sensor is located. If the shop skips this step, the warning light may flash or stay on even when the tire pressure is correct.
Sensor batteries also wear out. A dying sensor produces weak signals, which can look like a system failure rather than a tire problem. If your light stays on after a correct pressure recheck, the issue may be the sensor itself rather than the repaired tire.
Why the Warning Light Often Comes On Too Late
Under Federal Motor Vehicle Safety Standard 138, the TPMS warning must illuminate when pressure drops to 25 percent or more below the recommended cold inflation pressure. That means a slow leak may need weeks to turn the light on.
A tire losing 1 or 2 PSI per week can easily go a month before the dashboard warns you. By then, the tire may be significantly underinflated, driven on while hot, and possibly damaged beyond safe repair.
Temporary Repairs vs. Professional Repairs: Know the Limits
Self-installed plug kits are convenient for emergencies, but they are not the same as a professional repair. Understanding the difference helps you decide whether your tire is actually fixed or just temporarily patched.
What a Temporary Plug Kit Can and Cannot Fix
A plug kit pushes a coated rubber plug into the puncture from the outside. Its purpose is to get you to a shop, not to become a permanent fix.
Plug-only repairs do not re-seal the inner liner, do not protect against moisture reaching the steel belts, and are not accepted by many tire manufacturers as a permanent repair. If you have been driving on a plug for months, the tire may not be safe for a professional patch anymore. For the full breakdown, see our tire plug vs. patch comparison before deciding your next step.
Professional Patch-Plug Repair: The Industry Standard
A professional patch-plug repair requires removing the tire from the wheel. The technician prepares the inner liner around the puncture, cements the area, and bonds a patch-plug combination that seals the liner and fills the hole.
The U.S. Tire Manufacturers Association (USTMA) publishes industry repair standards that emphasize this combined approach. A patch-plug restores the air barrier and reinforces the damaged area. It is also the method most tire makers expect before they will honor a tire warranty after a puncture repair.
Puncture Size and Location Thresholds for a Legal, Safe Repair
Industry guidelines generally say the puncture must be in the tread area, measure roughly 1/4 inch (6 mm) or less in diameter, and not sit in the sidewall or shoulder. Larger nails, screws, and tools can damage the tire’s belt structure.
Some manufacturers set tighter limits for high-performance or load-rated tires. A responsible technician measures the puncture and tells you if the damage is outside the repairable range. If the repair fails because it should never have been attempted, the shop’s decision — not the tire — is the problem.
When the Tire Should Be Replaced Instead of Repaired
Sometimes a second repair is the wrong answer. Replacing the tire is often safer and cheaper than a failed repair plus the downtime of a third visit.
Sidewall Damage, Run-Flat Damage, and Structural Concerns
Sidewall cuts, bulges, and punctures are structural failures in the making. They compromise the tire’s ability to hold air and manage flex, especially in corners and at highway speeds.
Run-flat tires are different again. Driving on a run-flat while it is underinflated can damage the internal structure even if the outside looks fine. Many run-flat manufacturers instruct that the tire be replaced after any significant underinflation or impact event, regardless of appearance.
Multiple Repairs in the Same Tire: The 3-Repair Rule
A common industry rule of thumb is to limit repairs to three per tire. Some manufacturers allow fewer, depending on tire size, speed rating, and how close the punctures sit to one another.
Repairs also cannot overlap. If two punctures are close together, combining two patches can weaken the tire structure and create a dangerous flex point. If your tire already has multiple repairs and the current leak is a new puncture, ask the technician whether replacement is now the better option.
Age, Tread Wear, and State Inspection Considerations
Rubber tires degrade with age even when the tread looks good. Many manufacturers and tire industry sources suggest replacing tires after six to ten years from the manufacture date, which is stamped in the DOT code on the sidewall.
If the tire is worn to the wear bars, near the legal minimum tread depth, or showing cracks between tread blocks, a puncture repair is only temporary. State inspection rules vary, but damaged sidewalls, exposed cords, and worn tread are common reasons a vehicle will not pass even after a repair.
What a Proper Repair Costs and Questions to Ask Your Technician
Tire repair pricing is set by each shop and region. You can avoid surprises by asking for a quote before work begins and understanding what services the price includes.
Typical Repair Pricing, Warranty Coverage, and Shop Fees
Many shops repair tires they sold for free or at a reduced fee as part of a road hazard or service warranty. Walk-in repairs for tires bought elsewhere are typically billed at the shop’s standard flat rate for wheel removal, repair, remount, and balance.
Sometimes added to that price are valve stem replacement, tire disposal, and shop fees. Check your tire purchase paperwork before paying — the repair may already be covered. If you received a warranty certificate, ask the shop to honor it or file the claim for you.
Questions to Ask Before Authorizing Another Repair
Before the technician starts another repair, you deserve clear answers about what happened and what will happen next.
- Do ask them to show you the exact leak location before authorizing work.
- Do ask whether the leak is from the same puncture or a different one.
- Do confirm the repair method is a patch-plug rather than a plug-only fix.
- Do ask whether they will inspect the bead, valve stem, and TPMS sensor seal while the tire is off.
- Don’t authorize another attempt if the puncture sits in the sidewall or shoulder.
- Don’t accept a repair on a puncture larger than the 1/4-inch industry guideline without a clear explanation.
- Don’t drive away without a leak test result and a written note of the work performed.
Next Steps: Rechecking Pressure, TPMS Relearn, and Follow-Up
After a second repair, the shop should remount the tire, torque the lug nuts to the vehicle specification, and set all tires to the placard pressure. If the vehicle requires a TPMS relearn, the technician should perform it and confirm the light is out.
Drive normally, then recheck cold pressure the next morning using the same gauge you trusted before. Track the reading over the next few days. If the tire holds within a pound or two of the target, the repair is doing its job. If the pressure keeps dropping, the next step is wheel service or tire replacement, not a third patch.
How to Prevent Post-Repair Pressure Loss in the Future
A few simple habits keep you from living with repeat leaks and surprise warning lights. None of them require special tools.
Weekly Pressure Checks and Proper Inflation Technique
Set a weekly calendar reminder to check cold tire pressure before driving. Use the door-jamb placard as the target, and inflate only when the tires are cold for the most consistent results.
If you have never done a careful home pressure check, our guide to checking tire pressure at home walks through the steps, including why the gauge, the valve cap, and the timing all matter.
Understanding Inflator Duty Cycles and Gauge Accuracy Over Time
If you use a portable tire inflator after a repair, know its duty cycle. These devices need intervals to cool down between runs, and pushing them past that limit can cause them to shut off before reaching the set pressure.
Inflator gauges can also drift, so do not assume the unit’s built-in display is exact. A separate hand-held gauge is a good way to verify the final reading and catch a drop the inflator display missed.
Seasonal Temperature Drops and When to Recheck Cold Pressure
Air contracts as temperature drops. A common rule of thumb is that tire pressure changes by roughly 1 PSI for every 10°F change in ambient temperature. That means winter mornings can erase weeks of correct pressure readings.
After any repair, recheck pressure when the season changes and before road trips. A perfect patch still shows normal temperature-related changes. What matters is whether the tire loses pressure faster than temperature alone can explain.
- Best for: Drivers who want to locate the real cause of a repeat leak — repair-site failure, valve, bead, or a second puncture — before paying for unnecessary work.
- Think twice if: The puncture is on the sidewall or shoulder, the hole is oversized, or the same tire has failed more than once. Those conditions favor replacement.
- Next step: Perform a cold-pressure check and a soapy-water leak test today. Then bring the marked spot to a shop that uses a patch-plug repair method and can explain the result in plain terms.
Frequently Asked Questions
Not without first finding the leak. A tire that loses several PSI per day can overheat at highway speed and risk sudden air loss. Check the pressure before every drive and have the leak inspected as soon as possible.
It depends on the condition and location of the original repair. If the patch failed because of contamination or poor installation, a second patch-plug may be attempted after the area is cleaned. If the tire is damaged near the sidewall or the hole has enlarged, replacement is the safer call.
The system may need a relearn procedure so it recognizes the sensors after the wheel was removed and reinstalled. It could also mean the tire was set to the wrong pressure or a sensor seal is leaking. Check the placard pressure first, then recheck the light after driving briefly.
Pricing varies by shop, region, and whether the tire was purchased there. Many shops repair their own tires for free within the service warranty, while walk-in repairs are billed at the shop’s standard flat rate. Get a written quote before authorizing work.
A plug is pushed into the hole from the outside and does not re-seal the inner liner. A patch-plug is applied to the inside after removing the tire, sealing the liner and filling the hole in one bonded unit. The patch-plug is the industry standard for permanent repairs.
Replace the tire if the damage is in the sidewall or shoulder, the puncture is larger than about 1/4 inch, the sidewall has a bulge or cut, the tread is worn near the legal limit, or the same tire already has multiple repairs. When in doubt, ask a technician to show you the damage and explain the repair limits.