How to Test a Car Alternator Without Removing It Using a Multimeter
You can test a car alternator without removing it using a digital multimeter at the battery terminals. Four voltage checks — baseline, cranking, charging output, and AC ripple — reveal whether the alternator is charging properly or failing internally.
Knowing how to test a car alternator without removing it can save you time, money, and an unnecessary trip to the repair shop. With a digital multimeter and a few basic voltage checks, you can evaluate the charging system from the battery terminals while the alternator stays right where it is.
- Fast answer: Running-engine voltage between about 13.8 and 14.5V usually means the alternator is charging.
- Battery first: A discharged or damaged battery can make a good alternator look bad, so check.
- Diode check: AC ripple above about 0.5V suggests failed diodes that a simple DC voltage test.
- OBD2 limits: A scanner shows computer-reported voltage but cannot measure current, diode health, or belt condition.
- Hybrid caution: Many hybrids and EVs have no conventional alternator; never probe high-voltage cables.
Why In-Car Alternator Testing Works (and What It Can Diagnose)
The alternator keeps the battery charged and powers the electrical system while the engine runs. Testing it in the car is useful because you measure the whole circuit at once: the alternator, the drive belt, the wiring, and the battery connections all work together.
In-car testing can diagnose low output, no output, overcharging, voltage regulator problems, and failed diodes. It can also expose a loose belt or corroded cable that would never show up on a bench test.
What in-car testing cannot diagnose: internal bearing noise, some mechanical failures, and intermittent faults that appear only under extreme heat or load. Those may require removing the alternator or using a professional bench tester.
Tools, Safety, and Battery Basics Before You Start
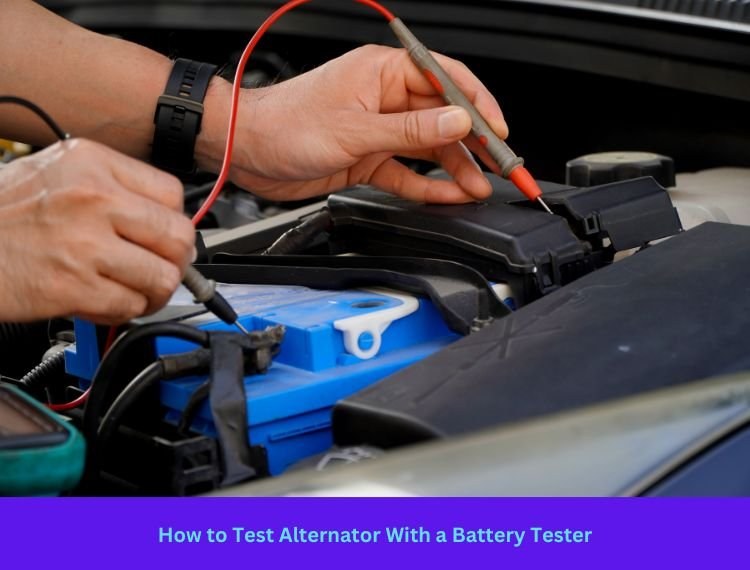
You need a digital multimeter, a safe place to park, a helper for the cranking test, and a battery that is reasonably charged. If your meter has a min/max capture function, you can do the cranking test alone.
Multimeter Settings and Test Lead Setup
Set the multimeter to DC volts. If the meter is not auto-ranging, choose the 20V range. Plug the red lead into the VΩ jack and the black lead into the COM jack. Inspect both leads for cracked insulation or loose probes before you begin.
You will switch to AC volts later for the diode ripple check. If you are new to multimeter basics, our guide on whether you can test a battery with a multimeter covers the same lead setup in more detail.
Battery Chemistry, State of Charge, and Health
A standard 12V lead-acid battery has six cells. A fully charged, rested battery usually reads about 12.6 volts. At 12.4 volts it is roughly 75 percent charged, and below about 12.2 volts the battery is weak enough to make alternator readings unreliable.
A deeply discharged battery forces the alternator to run at maximum output just to catch up. That can hide a real problem or make a weak alternator look worse than it is. When in doubt, charge the battery first.
Correct Connection Order and Damaged-Battery Stop Conditions
Connect the red lead to the positive terminal first, then the black lead to the negative terminal. Keep the probe tips away from the engine block, belts, and cooling fan. When you finish, remove the black lead first.
- Confirm the battery is reasonably charged before trusting an alternator reading
- Keep test leads clear of belts, pulleys, and the cooling fan
- Record each voltage so you can compare no-load and loaded results
- Test a damaged, swollen, or leaking battery
- Let the red and black probes touch each other while connected to the battery
- Clear OBD2 codes before you finish diagnosing the charging system
Step 1: Baseline Voltage Test (Engine Off)
Park on level ground, turn everything off, and close the doors. Connect the multimeter to the battery terminals and record the voltage before touching the key.
A healthy, fully charged battery reads about 12.6V. At 12.4V it is roughly three-quarters charged. If the reading is lower, charge the battery before continuing, or the alternator results will be misleading. For a full walkthrough, see how to test a car battery after sitting overnight.
Step 2: Cranking Voltage Test (Engine Start)
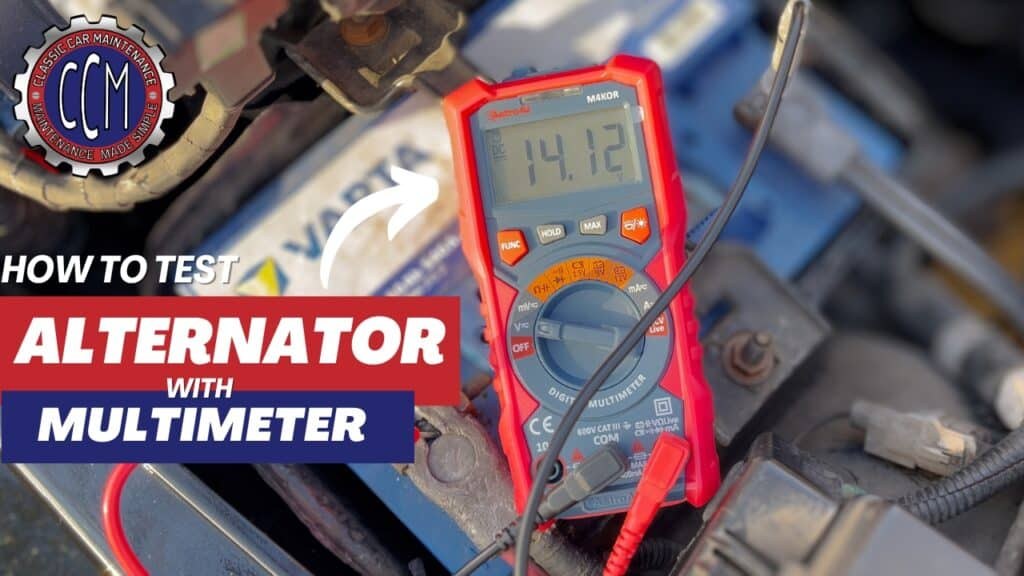
Keep the multimeter connected to the battery. Have your helper start the engine while you watch the display. If your meter has a min/max setting, use it to capture the lowest voltage during cranking.
A healthy battery usually stays above about 9.5 to 10 volts while cranking, but the exact limit varies with engine size, temperature, and battery type. If the voltage drops much lower, the battery is the likely problem, not the alternator. Check what battery voltage is too low to start a car for typical reference points.
Step 3: Alternator Output Test (Engine Running, No Load)
With the engine running and all accessories off, measure across the battery terminals again. Most 12V systems charge at about 13.8 to 14.5 volts. Some newer vehicles use smart charging and may run lower or vary the output based on battery state.
Ask your helper to rev the engine to about 1,500 to 2,000 RPM. The voltage should stay steady. If it climbs above about 15 volts, the voltage regulator may be failing and overcharging the battery.
Step 4: Load Test and AC Ripple Check
This step checks whether the alternator can handle real electrical demand and whether the internal diodes are converting AC to DC correctly.
Load Test With Accessories On
With the engine running, turn on the headlights to high beam, the blower fan to high, and the rear defroster if the vehicle has one. Recheck the voltage at the battery.
A healthy system should stay above roughly 13 volts under load. If it falls toward 12.5V or below, the alternator may not be keeping up, or the battery may be pulling more current than expected. Compare this reading with the no-load reading from Step 3.
AC Ripple Test for Diode Failure
Switch the multimeter to AC volts. With the engine running and the same loads on, measure across the battery terminals. The alternator’s diodes convert AC to DC. When a diode fails, AC ripple leaks into the electrical system.
Healthy systems usually show very low AC voltage, often below 0.1V. Readings above about 0.5V can point to failed diodes. High ripple can cause flickering headlights, erratic sensor readings, and strange electrical faults even when the DC voltage looks normal.
OBD2 Live Data vs. Multimeter Testing: What Each Tells You
An OBD2 scanner is a useful second opinion, but it is not a substitute for the multimeter tests above. The scanner reads system voltage from the engine computer, not directly from the alternator. For a deeper comparison, read can an OBD2 scanner detect a bad alternator.
OBD2 Port Location, Model-Year Protocol Coverage, and Ignition Mode
The OBD2 port is usually under the dashboard on the driver’s side, near the steering column. In the US, gasoline vehicles from 1996 onward must have OBD2, but the protocol can vary by make and model year. Some hybrids and diesels use different systems.
You typically need the ignition on with the engine off to connect, then start the engine to view live charging voltage. A scanner that works on one vehicle may not display live data on another.
Check: Confirm the scanner supports your vehicle’s protocol and model year, and locate the OBD2 port under the dash before you buy. Limitations: A generic scanner may not show charging voltage on every make, and it will not measure alternator current or diode health.
Live Data Limits, Emissions Readiness, and Reset Limitations
Live data can show battery voltage, the voltage the computer reports, and related trouble codes. It cannot measure current, diode health, or belt slip. A charging system that fails under load can look fine in live data because the computer reports voltage only, not amperage.
Clearing codes will not fix a charging problem, and it can reset emissions readiness monitors. If your vehicle is due for an emissions test, finish diagnosing the charging system before clearing anything.
App Permissions, Firmware, and When a Pro Is Needed
Bluetooth OBD2 scanners pair with a phone app that may request location, account, or vehicle identification data. Review the app permissions and privacy policy before connecting. Firmware updates also matter; an outdated scanner may miss newer protocols.
If your multimeter tests point to an alternator problem but live data looks normal, or if the battery still dies after a new alternator, a professional can perform an amperage-based load test and inspect the wiring. That is where DIY diagnosis reaches its limit.
Hybrid/EV Cautions, Limitations, and Next Steps
Hybrids and electric vehicles change the charging picture. Many do not have a conventional belt-driven alternator at all. Instead, a motor-generator charges the high-voltage battery, and a DC-DC converter charges the 12V battery.
Hybrid and EV High-Voltage System Cautions
Never assume a hybrid follows the same charging logic as a gasoline car. The 12V battery may still read about 12.6V at rest, but charging behavior is controlled by the hybrid system and may not match the 13.8 to 14.5V range described earlier.
If you are not certain about the system layout, test only the 12V battery with the vehicle in the correct ready mode, and follow the owner’s manual exactly.
When to Call a Professional and What Replacement Costs
Call a professional if the alternator fails multiple checks, the AC ripple is high, the belt is damaged, or charging system warning lights stay on. A shop can verify the fault with a load tester, inspect the belt and tensioner, and confirm the correct replacement part for your vehicle.
Alternator replacement costs vary widely by make, model, and whether you choose a remanufactured or new unit. Labor time also depends on where the alternator sits in the engine bay. Get a written estimate that includes the part, labor, and any belt or tensioner service.
- Best for: Owners who want a fast, reliable charging-system check without removing the alternator.
- Think twice if: The battery is deeply discharged, the vehicle is a hybrid or EV, or you need a full amperage load test under controlled conditions.
- Next step: Confirm the battery is charged, complete the four voltage checks, and compare the results with the charging specifications in your vehicle manual.
Frequently Asked Questions
Yes. A digital multimeter can check the charging system at the battery terminals while the alternator stays mounted in the engine bay. You do not need to remove the alternator for basic voltage, load, and AC ripple checks.
Most 12V systems produce about 13.8 to 14.5 volts with the engine running and accessories off. Some newer vehicles with smart charging may run lower or vary the output depending on battery state and electrical demand.
Yes. Switch the multimeter to AC volts and measure across the battery terminals with the engine running. A healthy system usually shows very low AC voltage; readings above about 0.5V can indicate failed diodes.
An OBD2 scanner can show the system voltage reported by the engine computer, which helps spot charging problems. It cannot test alternator current output, diode health, or belt condition directly.
Use caution. Many hybrids do not have a conventional alternator, and the high-voltage battery cables can be dangerous. Test the 12V battery only if you know the system layout, and never probe orange high-voltage cables.
Repeat the test once to confirm, check the battery state of charge and belt condition, then have the charging system load-tested by a professional. If the alternator is confirmed bad, compare remanufactured and new replacement options for your vehicle.