Why Does My Jump Starter Say Reverse Polarity and How to Fix It
Your jump starter usually says reverse polarity because it detects the clamps on the wrong terminals or cannot read the battery clearly due to poor contact, corrosion, low voltage, or a failed battery. Remove the clamps, verify the correct jump points, and stop if the battery is damaged, hot, leaking, swollen, or frozen.
Why does my jump starter say reverse polarity? In most cases, it means the pack thinks the positive and negative connections are wrong, or it cannot clearly detect the battery because of bad clamp contact, a very weak battery, corrosion, or a voltage mismatch. The safest fix is to stop, turn the jump pack off if your model has a power button, remove the clamps, verify the battery terminals, and reconnect in the correct order only after you are sure the battery is safe to touch.
- Main cause: The warning often means wrong clamp placement, but weak contact and a severely dead.
- Safe fix: Turn the pack off, remove the clamps, confirm positive and negative points, and reconnect.
- Compatibility: Check 12-volt vs 24-volt systems, battery chemistry, and any special rules for start-stop, hybrid.
- Pack condition: A low-charge or damaged jump pack can create its own problems, so inspect and.
- When to stop: Do not keep trying if the battery is swollen, leaking, cracked, hot, frozen, or.
Why Your Jump Starter Says Reverse Polarity: The Short Answer and the Immediate Safe Fix
What the warning actually means on a jump pack or charger
A reverse polarity warning is a safety feature. Modern jump starters use smart electronics in the pack, the clamp module, or both to check whether the red clamp is on positive and the black clamp is on negative or an approved ground point. If the pack sees the wrong electrical relationship, it usually blocks output instead of letting current flow.
That warning does not always mean you made a simple red-to-black mistake. It can also appear when the battery is deeply discharged, the clamps are barely touching metal, the terminals are badly corroded, or the vehicle uses a remote jump-start post that is easy to confuse with another metal point under the hood.
The safest first steps before touching the clamps again
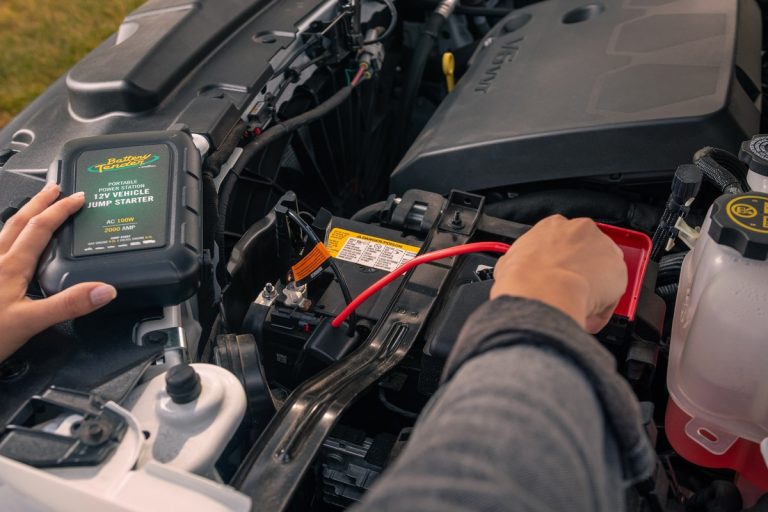
Start by turning the jump pack off if it has a manual power switch. Remove the black clamp first, then the red clamp. Set the clamps where they cannot touch each other or any bare metal on the vehicle.
Next, identify the battery positive terminal mark, usually a plus sign, red cover, or both. Then find the negative terminal or the manufacturer-approved ground point. If your owner’s manual shows remote jump terminals, use those locations instead of guessing.
Good light matters. A lot of reverse-polarity warnings happen at night, in bad weather, or when plastic covers hide the terminal markings. Use a flashlight before you reconnect anything.
When the alert is a true wiring mistake vs a battery or clamp-contact problem
If you clearly connected red to positive and black to a proper negative or ground point, but the warning stays on, the problem may be poor contact rather than true reverse polarity. Corrosion, paint, oily residue, or a clamp that is only gripping the edge of a terminal can confuse the pack.
A battery that is almost completely dead can also cause detection errors on some jump starters. The pack may not see stable battery voltage, so it refuses to engage. That is one reason the same vehicle may start with one booster pack but show a warning with another.
How Reverse Polarity Protection Works on Modern Jump Starters in 2026
Smart clamps, spark protection, and why many packs refuse to deliver power
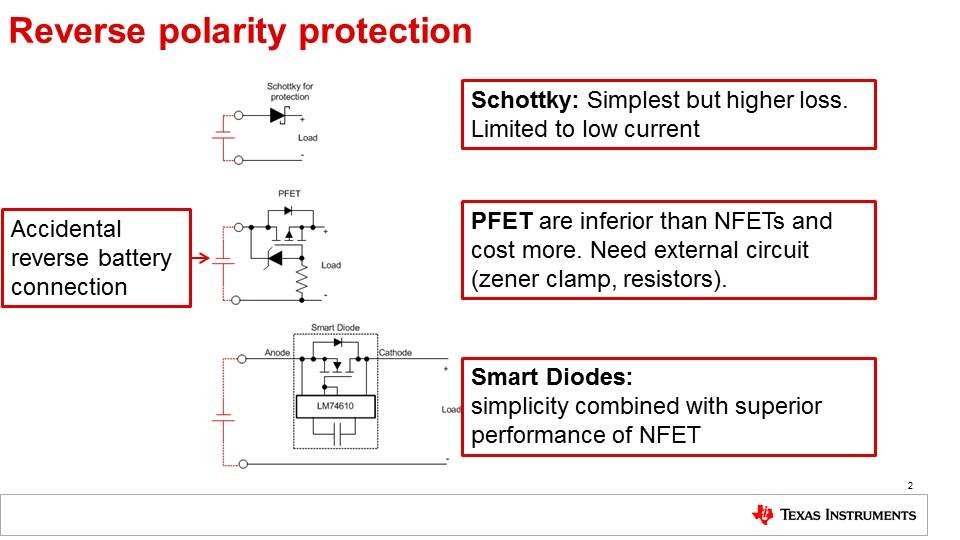
Most modern portable jump starters include reverse-polarity protection, short-circuit protection, and spark protection. In plain English, the pack checks the connection before it sends heavy current. If something looks wrong, it locks itself out.
That refusal is a feature, not a flaw. Older booster packs and basic cables can let a user make a dangerous mistake. Smart packs are designed to reduce the chance of arcing, damaged electronics, blown fuses, or a battery event caused by incorrect hookup.
12-volt passenger vehicles vs 24-volt systems and other voltage mismatches
Most US passenger cars, crossovers, and light trucks use 12-volt systems. Some commercial, heavy-duty, agricultural, or specialty vehicles use 24 volts. If you connect a 12-volt jump pack to a 24-volt system, the pack may show an error, including reverse polarity or another fault message, because the voltage is outside what it expects.
That is why compatibility comes first. If you are shopping for a pack, CarValleyNJ’s guide on how to choose a jump starter for your car is a good place to compare voltage, clamp design, and intended vehicle type.
Check: Verify your vehicle’s battery voltage, jump-start procedure, and whether it uses direct battery posts or remote under-hood terminals. Limitations: Some packs are intended only for 12-volt vehicles and may not support certain lithium batteries or commercial 24-volt systems.
Why lithium jump packs and lead-acid boosters may react differently
Lithium jump packs often use more aggressive electronic protection. They are compact and smart, but many will simply refuse to output power if the signal from the battery looks wrong. Traditional lead-acid booster packs may be less selective, especially older designs, though that can also mean less protection.
That difference explains why one tool may display reverse polarity while another seems to work. It does not automatically mean the smarter pack is defective. It may be detecting a connection or battery condition problem that the other tool does not screen as carefully.
Step-by-Step Troubleshooting When the Reverse Polarity Warning Will Not Clear
Correct connection order: positive to positive, negative to ground or approved negative point
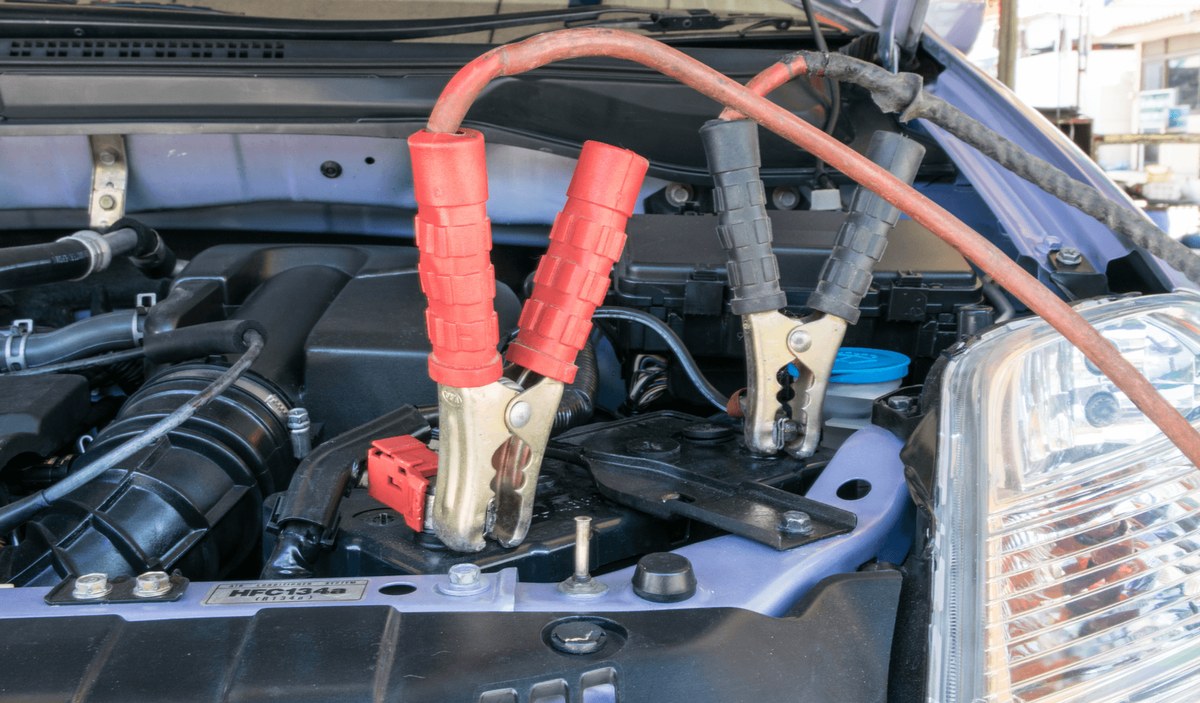
Use the simplest rule first: red clamp to the battery positive terminal or the positive remote jump post. Black clamp to the approved negative terminal or the designated chassis ground point listed in the owner’s manual.
Many automakers recommend grounding away from the battery on some vehicles. That reduces spark risk near the battery and may be required for proper current flow. If your vehicle has a marked ground stud, use it instead of a random bolt.
- Verify the plus and minus markings before each attempt
- Use the vehicle’s approved jump points when remote terminals are provided
- Reconnect only after the clamps are fully removed and separated
- Assume cable color alone is enough if the battery has been replaced before
- Clamp onto painted, rusty, or loose metal and expect a clean reading
- Bypass safety protections unless the manufacturer specifically allows a manual override and explains how
How to identify the real battery terminals when covers, corrosion, or poor lighting cause confusion
Look for stamped plus and minus symbols first. If the battery has plastic caps, lift or remove only as the manual allows. On some vehicles, the visible battery area is partly covered, while the real jump points sit under marked covers elsewhere in the engine bay.
Corrosion can hide markings. White, blue, or green buildup around the posts can make a positive terminal look like a plain metal lump. Clean identification matters more than speed. If you are unsure, stop and check the manual or call for help.
Checking clamp bite, cable condition, pack charge level, and damaged-fuse or relay issues
Make sure each clamp is biting solidly onto clean metal, not just touching the edge. Wiggle should be minimal. Weak spring pressure, bent clamp jaws, frayed cables, or heat-damaged insulation can all cause bad contact and false warnings.
Also check the jump pack’s own charge level. A pack that has been sitting for months may not have enough reserve to operate its protection circuits correctly, much less start the vehicle. If you are unsure how long your unit can sit between top-offs, see how long portable jump starters hold a charge.
Some smart clamp assemblies contain an inline fuse or relay. If that component fails, the pack may show a warning or simply refuse to engage. Your product manual may list indicator-light meanings and service steps, but many clamp modules are not user-repairable.
State of charge vs battery health: why a deeply discharged or failed battery can trigger false warnings
A battery can be low on charge, or it can be unhealthy. Those are not the same thing. A deeply discharged battery may still recover after charging. A failed battery may accept little charge, drop voltage quickly, or confuse a smart jump pack during detection.
If the car needed a jump after sitting overnight, the root cause may be more than one bad start. It could be battery age, a parasitic drain, or a charging problem. This related guide on why a car battery dies after sitting overnight can help narrow that down.
If you have access to a proper battery tester, use it after the vehicle is safe and stable. A tester can help separate low charge from low health, though results vary by tool and battery type.
Battery, Vehicle, and Power-System Compatibility Checks Before You Try Again
Battery chemistry compatibility: flooded, AGM, EFB, gel, lithium, and manufacturer restrictions
Not every jump starter is intended for every battery chemistry. Many common packs work with standard 12-volt lead-acid batteries such as flooded, AGM, and sometimes EFB. Gel and lithium starter batteries may have extra restrictions depending on the pack and the vehicle maker’s instructions.
Always read both manuals. The jump starter manual tells you what battery types it supports. The vehicle manual tells you whether jump-starting is allowed, where to connect, and whether special procedures apply.
Model-year and vehicle-type cautions for start-stop systems, hybrids, plug-in hybrids, and EVs
Start-stop vehicles often still use a 12-volt battery, but the battery type and sensor setup may be more sensitive. Hybrids and plug-in hybrids can also have a 12-volt system that controls startup of the larger system, yet the under-hood layout may be very different from a normal gas vehicle.
EVs and hybrids add serious safety concerns because high-voltage components may be nearby. You should only use the designated 12-volt jump points and only if the owner’s manual says it is allowed.
Current limits, engine size claims, and why peak amps do not tell the whole story
Packaging often highlights peak amps, but that number alone does not guarantee a successful jump. Real-world starting performance depends on clamp quality, cable resistance, pack charge level, temperature, engine condition, and the actual battery problem.
That is why current claims should be read with context. If you want a clearer explanation of sizing, see how many amps you need to jump-start a car. It helps explain why a compact pack may work well on one vehicle but struggle on another.
When a swollen, frozen, leaking, cracked, or hot battery is a stop condition
Physical battery damage is not something to troubleshoot with repeated jump attempts. A swollen case, visible crack, leaking fluid, strong rotten-egg smell, or unusual heat means stop. A frozen battery is also a hard stop because applying current can create a dangerous situation.
If any of those conditions are present, do not reconnect the jump pack. Move away, ventilate the area if possible, and get professional help.
Safe Jump-Starting Procedure for U.S. Drivers: Placement, Visibility, and Restart Best Practices
Choosing a safe location away from traffic and improving visibility with flashers, vest, and triangles
If the car is on a shoulder, in a dark parking lot, or near moving traffic, personal safety comes first. Turn on hazard flashers. If you have them, use a reflective vest and warning triangles. If the location feels unsafe, stay out of traffic and call roadside assistance.
Flat ground is best. Set the parking brake and shift into park or neutral as the vehicle manual directs. Keep children and bystanders away from the engine bay during the jump-start attempt.
Where to place the jump pack, how to route cables, and what to avoid near belts or fans
Place the jump pack on a stable surface away from moving parts, puddles, and extreme heat. Do not let the pack dangle by its cables. Route the leads so they cannot fall into belts, cooling fans, or pulleys if the engine starts suddenly.
Keep the clamps separated and the cables untwisted as much as possible. Tight cable bends and stretched leads make it easier for a clamp to slip loose at the worst time.
Ignition mode, accessory load reduction, crank timing, and cooldown between attempts
Turn off lights, climate control, heated seats, audio, and other accessories before cranking. That reduces electrical load. Connect the pack, wait as the jump starter manual recommends, then try a short crank rather than a long one.
If the engine does not start, stop and give the pack time to recover between attempts. Repeated long cranks can overheat the jump pack, stress the starter, and hide the real problem.
Post-start checks: charging-system warning lights, idle time, and whether the battery will hold a charge
Once the engine starts, disconnect the jump pack in the order the manual specifies, usually black first and then red. Watch the dash. If the battery or charging-system warning light stays on, the issue may involve the alternator, battery sensor, wiring, or the battery itself.
Letting the engine idle may help stabilize the system, but idling alone does not guarantee a weak battery is fixed. If the vehicle dies again soon after shutdown, more diagnosis is needed.
When Reverse Polarity Is Really a Sign of a Larger Electrical or Diagnostic Problem
Bad grounds, blown fusible links, battery-sensor issues, and alternator-related faults
Sometimes the jump starter warning is only the first clue. Corroded grounds, damaged battery cables, blown fusible links, or a failed current sensor can make the electrical system behave strangely even when the clamps are connected correctly.
An alternator problem can also lead to repeated no-start events because the battery never gets fully recharged in normal driving. If the battery tests good but keeps going flat, the charging system deserves attention.
What an OBD2 scan can and cannot confirm after a no-start or jump-start event
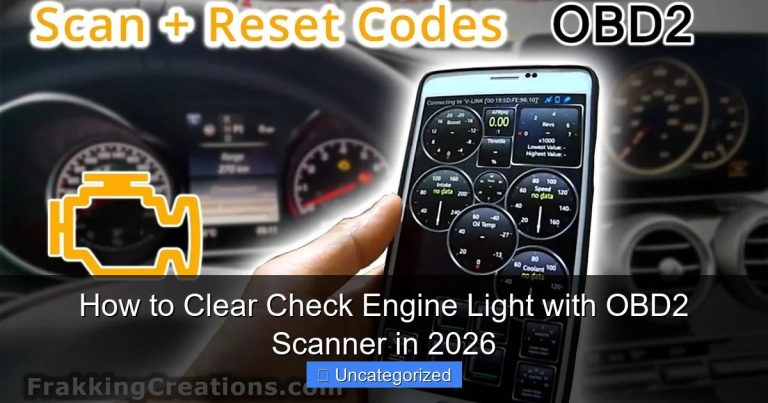
An OBD2 scan tool may show charging-related or communication faults, but it cannot directly prove that a battery or jump pack is good. It is best used as part of a bigger diagnosis, not as the only answer.
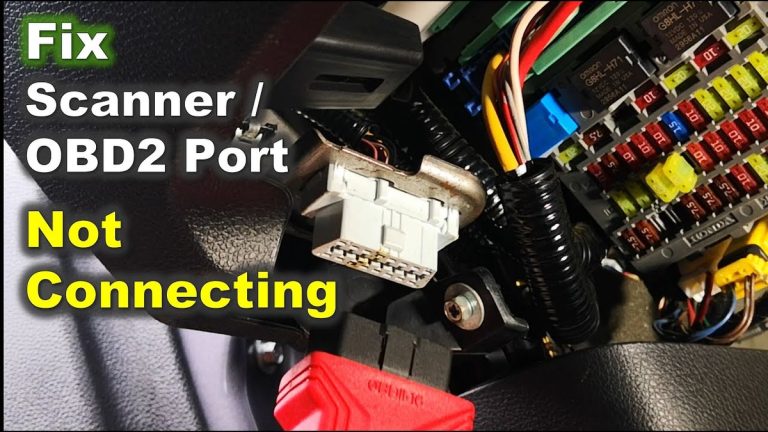
If your scanner will not connect after a no-start event, power supply issues, ignition mode, blown fuses, or vehicle compatibility may be involved. This guide on why an OBD2 scanner won’t connect covers common reasons.
Model-year and protocol coverage, port location, and ignition mode needed for a proper scan
Most US-market vehicles use the OBD2 port under the dash, but exact location varies. Some scan tools need the key in accessory or on mode, while others need the engine running for certain live data. Coverage also varies by model year, protocol support, and the tool’s software level.
That means a successful scan depends on both the vehicle and the tool being ready. A scan tool can help after the jump, but only if it is compatible and powered correctly.
Code and live-data limits, emissions readiness, reset limitations, app permissions, firmware, and when to call a professional
Basic code readers usually handle emissions-related powertrain codes. They may not read body, chassis, battery-management, or manufacturer-specific faults. App-based tools can add convenience, but they may require phone permissions, firmware updates, account setup, or subscription decisions depending on brand.
Do not clear codes before recording them, especially if the car has recurring battery or charging symptoms. If the vehicle still will not start, keeps showing electrical warnings, or has hybrid-system messages, professional diagnosis is the safer next step.
Jump Starter Comparison: Smart Lithium Pack vs Traditional Booster Pack vs Jumper Cables
Safety protections, reverse-polarity detection, storage life, and cold-weather performance
Smart lithium packs are popular because they are compact and usually include reverse-polarity protection. Traditional booster packs are bulkier but can be useful for larger vehicles and repeated service use. Jumper cables are simple and often durable, but they depend on a second vehicle and good user technique.
Cold weather can reduce battery performance and affect jump-start results. Storage habits matter too, especially for portable packs that need periodic recharging.
| Option | Best for | Owner consideration | Driver consideration |
|---|---|---|---|
| Smart lithium pack | Daily drivers, commuters, and compact roadside kits | Needs regular recharging and compatibility checks | Strong safety protections and easier solo use |
| Traditional booster pack | Frequent use, larger engines, and service environments | Heavier to store and move | Can be easier to grip and position, but bulkier roadside |
| Jumper cables | Budget-minded drivers with access to another vehicle | Lower maintenance but depends on a second vehicle | More user error risk and less built-in protection |
Which option fits commuters, older vehicles, trucks, and infrequent drivers
Commuters often benefit most from a compact smart pack that can stay charged in the trunk and be used without another car. Older vehicles may still work fine with cables or a booster pack, but condition of the battery cables and grounds matters more than many owners expect.
Truck owners should be especially careful about pack sizing and diesel requirements. If that is your use case, CarValleyNJ also has guides on the best jump starter for diesel trucks and jump starters for trucks.
Ownership cost, maintenance burden, warranty/support expectations, and practical limitations
The cheapest option up front is often jumper cables, but they are not always the most convenient or safest for solo drivers. Portable jump packs cost more and require charging discipline, storage care, and occasional inspection. Warranty length, clamp replacement availability, and support quality vary by brand.
Practical limits matter too. A pack that sits dead in the trunk is not much help, and a cable set is useless if no second vehicle is available.
How to Prevent Reverse Polarity Warnings in the Future
Battery-terminal labeling, clamp-color habits, and using the door-jamb and under-hood diagrams correctly
Make the next roadside event easier before it happens. If your battery markings are hard to see, clean the area and make sure the factory covers and labels are intact. Build a habit of saying the connection out loud: red to positive, black to ground or negative.
Some vehicles include under-hood labels or diagrams near the fuse box or jump posts. Use those, but confirm they match your exact engine bay layout and model configuration.
Storage conditions, recharge intervals, firmware updates, and periodic pack-condition inspection
Heat, deep discharge, and long neglect shorten the useful life of a jump pack. Store it where the manufacturer allows, and recharge it on the recommended schedule. Some smart packs and connected tools may also receive firmware updates that improve behavior or fix known issues.
Inspect the case for cracks, melted spots, swelling, or connector looseness. If anything looks off, stop using the pack until the manufacturer or seller confirms the next step.
Building a complete roadside kit: gloves, light, gauge, inflator, tire seal limits, and tool completeness
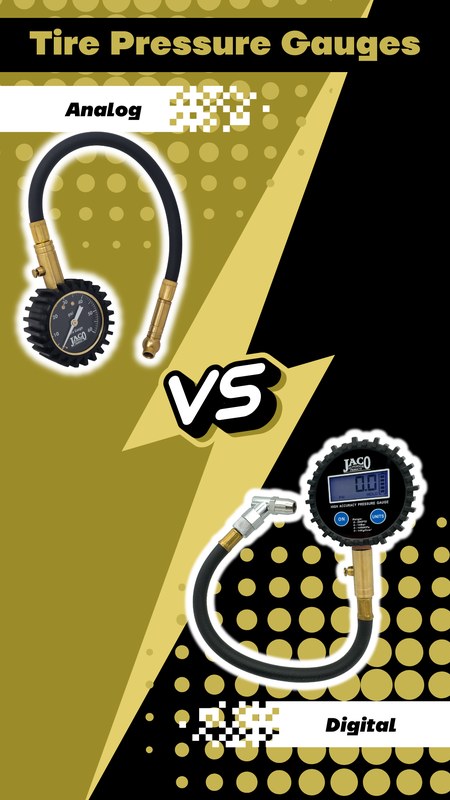
A jump starter works better as part of a real roadside kit. Include gloves, a flashlight, reflective gear, and a tire pressure gauge. An inflator can also help if a low battery and low tire happen at the same time, but sealant and temporary repairs have limits and should not replace proper tire service.
Post-use inspection for clamps, cables, case damage, odor, heat, and pack recharge timing
After each use, check for burned smell, unusual heat, cracked clamp covers, or damaged cable insulation. Recharge the pack soon after use rather than tossing it back into storage half empty. That habit reduces the chance of a false warning caused by a weak pack next time.
When DIY Ends: Professional Repair Thresholds, Legal/Safety Considerations, and Your Next Step
Situations where roadside assistance, a battery shop, or a repair facility is the safer choice
If you are on a dangerous shoulder, dealing with a damaged battery, unsure about the correct jump points, or seeing repeated electrical warnings, professional help is the better call. The same goes for vehicles that crank slowly even with a fully charged pack or die again right after starting.
Hybrid/EV high-voltage cautions, owner-manual requirements, and legal variation by state or roadside policy
Hybrid and EV procedures are more sensitive, and roadside-assistance policies can vary. Some states and agencies also have different rules about emergency lighting, shoulder work, and towing practices.
How to decide between replacing the battery, replacing the jump starter, or diagnosing the charging system
Replace the battery if testing shows poor health, internal failure, or inability to hold charge. Replace the jump starter if the pack will not hold charge, the clamp module is damaged, or the manufacturer’s troubleshooting points to a failed unit. Diagnose the charging system if the battery repeatedly goes flat, the dash shows charging warnings, or voltage problems return after a new battery.
The main goal is not just clearing the reverse-polarity message once. It is finding out whether the warning came from a simple hookup mistake, a weak connection, a failing battery, or a larger electrical problem that will leave you stranded again.
- Best for: Drivers who want a clear, safe explanation before reconnecting a jump pack after a reverse-polarity warning.
- Think twice if: The battery is damaged, the vehicle is a hybrid or EV with unclear jump points, or the warning returns after correct reconnection.
- Next step: Verify the correct terminals, inspect clamp contact and battery condition, then test the battery and charging system if the alert will not clear.
Frequently Asked Questions
Yes. Some smart jump starters can misread a battery that is deeply discharged or internally failed, especially if clamp contact is weak. Inspect the terminals, clean the contact points, and test the battery if the warning keeps coming back.
Use the vehicle owner’s manual as the final guide. Many vehicles allow the negative terminal, while others require a designated ground point under the hood for safer jump-starting.
Many 12-volt jump starters support common lead-acid battery types, including AGM, but not every model does. Check the jump pack manual and your vehicle manual before using it on a start-stop system.
Only if the manufacturer allows jump-starting through the vehicle’s 12-volt system and provides clear jump points. Never connect to orange high-voltage cables or covered high-voltage components.
That depends on the pack design, battery chemistry, and storage temperature. Follow the manufacturer’s recharge schedule, because a neglected pack may show errors or fail when you need it.
Confirm your vehicle voltage, engine type, battery chemistry, and any hybrid or start-stop restrictions. Also check clamp quality, storage requirements, warranty support, and whether the pack needs periodic firmware updates or special accessories.