How to Find a Slow Tire Leak with Soapy Water Without a Tire Shop
The soapy water test is the most reliable home method for finding a slow tire leak. Spray a soap-and-water mix on the valve stem, bead, tread, and sidewall, then watch for steady bubbles that reveal the leak point.
Learning how to find a slow tire leak with soapy water is one of the fastest ways to avoid an unnecessary trip to the tire shop. A spray bottle, a few drops of dish soap, and about 15 minutes can pinpoint the exact source of a leak that a weekly air top-off won’t fix.
- Use the placard: Set tires to the door-jamb cold pressure, not the sidewall maximum.
- Spray in order: Valve stem, bead, tread, then sidewall — and wait a full minute per section.
- Know repair limits: Only small tread-area punctures are safely repairable; sidewall damage means replacement.
- Check TPMS after: Reinflate, confirm pressure with a separate gauge, and complete any needed TPMS relearn.
- Ask for help if needed: Hidden inner-liner or rim leaks may require a professional water-tank test.
The Quick Answer: How the Soapy Water Test Finds a Slow Leak
The soapy water test works because air escaping from a tire pushes through the soap film and creates bubbles. Where the bubbles appear, that’s your leak. The same principle is used in professional tire shops, just with commercial leak-detection fluid instead of dish soap.
You don’t need special equipment. Mix about a teaspoon of dish soap into a spray bottle of water, spray the tire, and watch for bubble growth. A slow leak may take 30 to 60 seconds to show up, so patience matters.
Start With the Right Baseline: Door-Jamb Placard and Cold Pressure
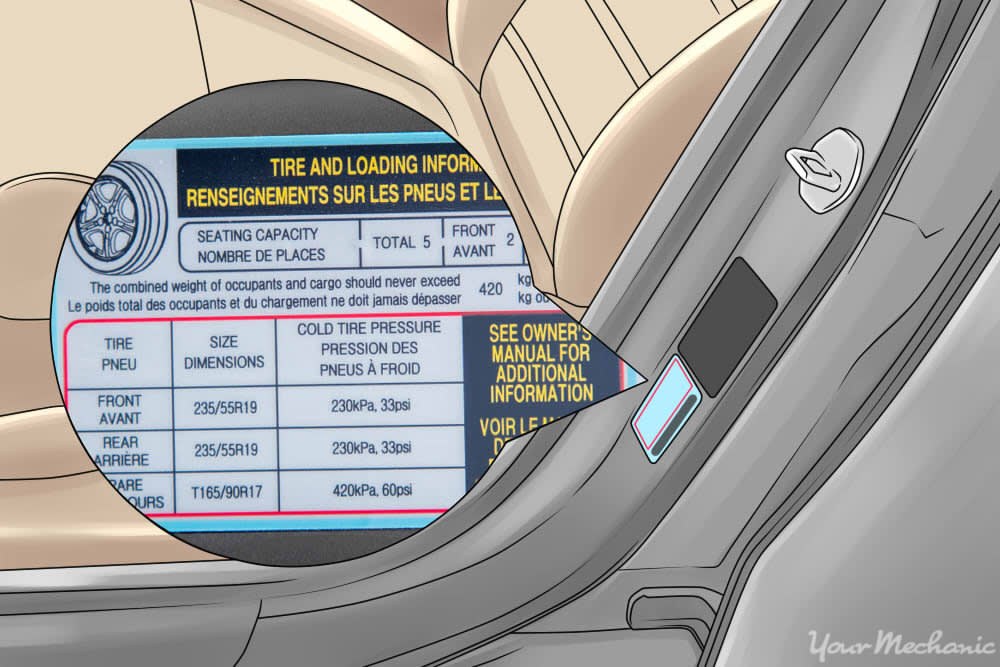
Before you spray anything, you need to know the correct pressure for your tires. A tire that’s badly underinflated can be hard to test properly, and driving on it is unsafe.
Door-Jamb Placard vs. Sidewall Rating: Which One to Trust
Open the driver’s door and look at the sticker on the door jamb. That placard lists the recommended cold tire pressure set by the vehicle manufacturer. This is the number you should use for both normal driving and the leak test.
The number molded into the tire sidewall is the maximum pressure the tire can hold, not the recommended operating pressure. Trust the door-jamb placard, not the sidewall.
Cold Pressure and Tire Gauge Accuracy
“Cold” means the tires haven’t been driven on for at least a few hours. Driving heats the air inside the tire and raises the pressure reading. If you’ve just driven, the reading will be higher than the true cold pressure. Our guide on how long to wait before checking tire pressure after driving explains this in more detail.
Gauge accuracy also matters. A gauge that’s off by 2-3 psi can send you chasing a leak that isn’t there, or make you miss the real problem. If you want a refresher on the basics, our article on how to check tire pressure at home covers the equipment and steps.
Step-by-Step: How to Find a Slow Tire Leak with Soapy Water
Once the tire is at the correct cold pressure, you’re ready to test. Here’s the full process, from setup to reading the results.
Inflate the Tire, Chock the Wheels, and Work Safely
Inflate the tire to the placard pressure before testing. A tire at 15 psi may not push air out fast enough to create visible bubbles, even with a real leak. Use a portable inflator or a shop air hose, and check the pressure with your own gauge.
Park on level ground, set the parking brake, and chock the opposite wheels. If you need to remove the wheel to find a leak on the inner side, use a jack and jack stands rated for the vehicle’s weight. Never crawl under a car supported only by a jack.
Spray the Valve Stem, Bead, Tread, and Sidewall
Fill a clean spray bottle with water and add a few drops of dish soap. Swirl gently. You want a soapy film, not a thick foam.
Work in a logical order to avoid missing anything:
- Valve stem: Spray the base and the tip. Remove the cap and spray the core itself.
- Bead: Spray where the tire meets the rim on both sides.
- Tread: Spray the entire contact surface, looking for nails, screws, or punctures.
- Sidewall: Spray the full sidewall, including the shoulder area.
Wait 30 to 60 seconds after each section before moving on. Slow leaks can take a while to form visible bubbles, especially if the tire is only a few psi low.
Reading the Bubbles: What a Slow Leak Looks Like
A slow leak usually produces a small cluster of fine bubbles that grows slowly, or a single bubble that expands over several seconds. A fast leak produces large bubbles almost immediately. If you see steady bubbling at one spot, that’s your leak.
Mark the spot with chalk or a grease pencil before you move the tire or deflate it. Once the tire is off the ground or rotated, the leak point can be surprisingly hard to find again.
- Use the door-jamb placard pressure and check the tire cold
- Spray the valve stem first, since it’s the most common leak point
- Wait a full minute before deciding a section is leak-free
- Mark the leak spot with chalk before moving the tire
- Use the sidewall maximum pressure as your target
- Test a tire that is visibly flat or damaged
- Rely on bubbles alone — confirm the leak with a second spray
- Ignore the valve core, which can leak even when the stem looks fine
Found the Leak? Know When It’s Fixable and When It’s Not
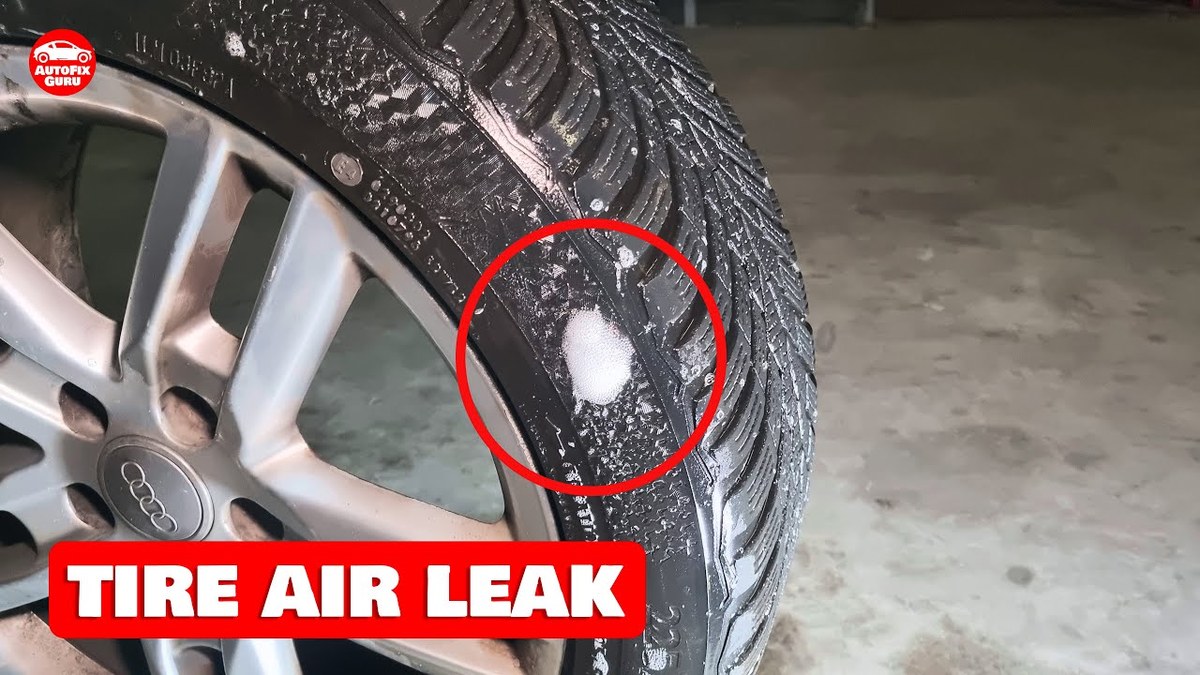
Not every leak can be repaired. The location and size of the puncture determine whether a safe repair is possible, and the rules exist for good reason.
Puncture Location and Size Limits for Safe Repair
Industry guidelines generally allow repairs for punctures in the tread area that are smaller than about 1/4 inch (6mm) in diameter. Punctures in the sidewall or shoulder are not safely repairable because those areas flex constantly and a patch can’t seal reliably.
If the leak is in the sidewall, the tire needs replacement. Our article on whether a tire plug kit can fix a sidewall puncture explains why this is the case.
Temporary Repair Kits vs. Professional Patch-and-Plug
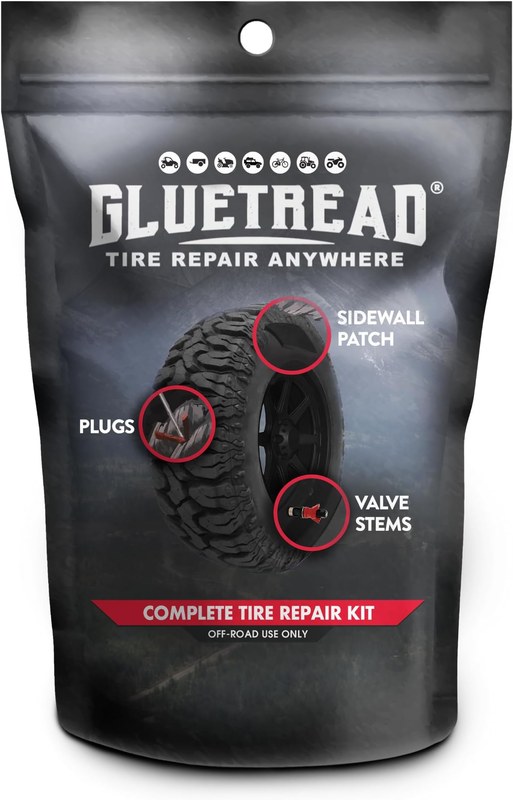
A tire plug kit can get you back on the road temporarily, but it’s not a permanent fix. Plugs seal the hole from the outside and can fail over time. The proper repair is a patch-and-plug applied from inside the tire after it’s removed from the wheel.
If the leak is in the tread area and within the size limit, a professional patch-and-plug is the safer long-term option. If you’re in a pinch, a plug kit can be a temporary solution, but plan to have the tire professionally repaired or replaced soon after.
After the Fix: TPMS Relearn, Inflation, and Inflator Duty Cycle
Once the leak is fixed, you still need to get the tire back to the correct pressure and make sure the tire pressure monitoring system (TPMS) is working properly.
TPMS Relearn Limits: When It Resets on Its Own vs. Needs a Tool
Some vehicles automatically reset the TPMS after you reinflate the tire and drive for a few minutes. Others require a TPMS relearn procedure, which may involve a scan tool or a magnet. If the TPMS light stays on after reinflating, check your owner’s manual. Our guide on how to reset the TPMS light after a tire rotation covers the common approaches.
Inflator Duty Cycle and Accurate Pressure Refill
If you’re using a portable tire inflator, check its duty cycle before you start. Most portable inflators are designed to run for a limited time, often 10 to 20 minutes, before they need to cool down. Running one past its duty cycle can overheat the motor and shorten its life.
Also, don’t trust the inflator’s built-in gauge as the final word. Many are accurate, but some drift over time. Use a separate, known-good tire gauge to confirm the final pressure.
When Soapy Water Isn’t Enough: Hidden and Intermittent Leaks
The soapy water test is excellent for finding leaks in the tread, sidewall, bead, and valve stem. But some leaks are harder to pin down.
A leak in the inner liner, the rubber layer inside the tire, may not show bubbles on the outside. A corroded or bent rim can leak intermittently, especially in cold weather. A faulty valve core can leak only when the tire is under load or at certain angles. In these cases, the tire may need to be removed from the wheel and inspected from the inside, or submerged in water to reveal the leak.
If you can’t find the leak with soapy water and the tire keeps losing pressure, it’s time for a professional diagnostic. Many shops can find the leak quickly using a water tank or a commercial leak detector.
Cost, Safety, and Legal Considerations Before You Drive Again
The soapy water test costs almost nothing. A spray bottle and dish soap are likely already in your home. Compare that to a shop diagnostic fee, which can range widely depending on the shop and location.
Safety comes first. A tire that loses more than a few psi per week is a safety risk, especially at highway speeds. Underinflated tires overheat, wear unevenly, and reduce fuel economy. If you’re not confident in your repair, have a professional inspect it.
- Best for: DIY-minded drivers who want to locate a slow leak at home in about 15 minutes for the cost of a few drops of dish soap.
- Think twice if: The leak is in the sidewall, the tire is severely damaged, or the soap test finds nothing after two careful passes — those cases need a professional.
- Next step: Check your door-jamb placard, inflate the tire cold, and spray the valve stem first before moving to the tread.
Frequently Asked Questions
Plan for about 15 minutes per tire, plus time to inflate the tire to the correct cold pressure. A slow leak can take 30 to 60 seconds to form visible bubbles, so don’t rush each section.
About one teaspoon of dish soap per 16 to 20 ounces of water works well. You want enough soap to create a stable film, but not so much that the water turns foamy and hides the bubbles.
Yes. Dish soap is the standard DIY substitute and works well for most slow leaks. Commercial leak detectors are more sensitive and may be worth it if you test tires often.
No. Leaks in the inner liner, corroded rims, and intermittent valve core issues may not show bubbles on the outside. If the test finds nothing and the tire keeps losing pressure, have a shop inspect it.
Only if the tire can be inflated to a safe pressure and holds it long enough for the trip. If the tire is visibly low or the leak is in the sidewall, call for roadside assistance instead.
No. A plug is a temporary fix. The proper repair is a patch-and-plug applied from inside the tire. Have the tire professionally repaired or replaced as soon as possible.