How Long Can You Drive with a Nail in Your Tire: Practical Guide
You may be able to drive a very short distance with a nail in the center tread if the tire still holds near the correct pressure, but there is no fixed safe mileage. If the tire is visibly low, the puncture is near the sidewall, or you need freeway speed, stop and use a spare, roadside help, or a tow.
How long can you drive with a nail in your tire depends on where the nail is, how fast air is leaking, and whether the tire has already been damaged from low pressure. In many cases, the safest rule is simple: drive only as far as needed to get out of danger and reach a nearby tire shop, or stop and call for help if the tire is losing air quickly, the puncture is near the sidewall, or the TPMS warning is flashing with obvious low pressure.
- Puncture location: Center-tread punctures are the most likely to be repairable; shoulder and sidewall damage usually.
- Pressure check: Use the driver-door placard for the correct cold pressure, not the tire sidewall number.
- Temporary fixes: Plugs and sealants can help you reach service, but they are not equal to.
- Vehicle type: Run-flats, trucks, SUVs, hybrids, and EVs can have different limits, load concerns, and spare-tire.
- Best next step: If pressure is dropping fast or the tire was driven low, protect the tire.
How Long Can You Drive with a Nail in Your Tire? The Short Answer and the Safe Rule
There is no universal safe mileage after a nail puncture. Some tires lose only a little air over many hours. Others go from usable to unsafe in minutes. That is why “I made it 20 miles last time” is not a reliable rule for your current situation.
If the tire still holds close to the vehicle’s recommended cold pressure, the nail is in the center tread, and the shop is only a short local drive away, some drivers may be able to limp there slowly. But if pressure is already low, the tire looks visibly squashed, or the puncture is in the shoulder or sidewall, driving farther can destroy the tire and raise the risk of a blowout.
Why there is no fixed mileage limit once a nail is in the tread
A nail does not create the same leak in every tire. The angle of the puncture matters. The size of the object matters. So do tire construction, tread depth, outside temperature, speed, cargo weight, and road surface. A tiny screw in the center tread may seep air slowly. A larger nail or a puncture that shifts as the tire rolls can leak much faster.
Even a “slow” leak can become a major problem if you keep driving. As air pressure drops, the tire flexes more. That extra flex creates heat, and heat is what turns a repairable puncture into internal tire damage. If you want a deeper look at the risks of running low, see can you drive with low tire pressure.
When you should stop immediately instead of trying to drive farther
Stop driving and arrange roadside help if the tire is visibly flat, the steering feels unstable, you hear thumping, the car pulls hard to one side, or the puncture is in the sidewall. The same applies if you cannot safely verify pressure, or if the tire lost a lot of air in a short time after inflation.
What Decides Whether You Can Drive a Few Miles or Need a Tow Right Now
The right answer comes from a few practical checks. Location is first. Tire type is next. Then look at pressure, load, speed, weather, and road conditions. Together, these tell you whether a short, careful drive is reasonable or whether the tire is no longer safe to support the vehicle.
Puncture location: center tread vs shoulder vs sidewall
A puncture in the center tread area has the best chance of being repairable, assuming the hole is small enough and the tire has not been damaged by low-pressure driving. This is the part of the tire most shops are willing to inspect for a proper patch-plug repair.
The shoulder area, where the tread curves toward the sidewall, is much more questionable. That part of the tire flexes more under load. Sidewall punctures are usually not considered safely repairable. If you are comparing repair chances by location, read can a tire plug kit fix a sidewall puncture.
Tire type and vehicle compatibility: standard, run-flat, LT, performance, hybrid, and EV tires
Standard passenger tires usually follow the most familiar repair rules. Run-flat tires are different. Some can be driven for a limited distance after pressure loss, but only under the conditions described by the vehicle and tire maker. If the run-flat was driven too far or too fast while deflated, replacement may still be required.
Light-truck tires, performance tires, hybrid tires, and EV tires also need special attention. Trucks and SUVs often carry more weight, which raises stress on a damaged tire. Performance tires may have stiffer construction and lower profiles, which can make damage less forgiving. Hybrid and EV tires often deal with higher vehicle weight and instant torque, so low-pressure driving can be especially hard on them.
Check: Verify whether your vehicle uses run-flat tires, a mobility kit instead of a spare, staggered tire sizes, or EV-specific load-rated tires. Limitations: A safe option for one vehicle may not fit another, especially if the spare, sealant, or repair method is restricted by the owner’s manual.
Cold pressure, load, speed, weather, and road conditions that shorten safe driving distance
Low pressure is the biggest warning sign. A tire that is only a few psi down may still be stable enough for a very short trip to a local shop. A tire that is far below placard pressure can overheat quickly. Heavy passengers, cargo, towing, freeway speed, potholes, and hot pavement all make the situation worse.
Wet roads and poor visibility also matter. A damaged tire gives you less safety margin during braking and lane changes. Even if the leak seems slow, the “safe” distance gets shorter when the trip includes highway traffic or rough pavement.
How to Check the Tire Safely Before You Move the Vehicle
Before you decide to drive, inflate, or swap to a spare, do a calm safety check. Many bad roadside choices happen because drivers rush while parked in an unsafe spot or rely only on the dashboard warning instead of checking the actual tire pressure.
Park in a safe location, improve traffic visibility, and inspect the tire without creating extra risk
If possible, pull well away from traffic onto a level shoulder, parking lot, or side street. Turn on hazard lights. If you have reflective triangles or other emergency gear, use them according to the product instructions and local rules. Avoid kneeling near the traffic side of the vehicle if cars are passing close by.
Look for the object, but do not pull it out on the roadside. The nail or screw may be slowing the leak. Removing it can make the tire lose air much faster.
Use the door-jamb placard, not the sidewall, to confirm the correct cold pressure
The correct pressure for your vehicle is usually on the driver’s door-jamb placard, not molded into the tire sidewall. The sidewall number is not your target daily pressure. It is part of the tire’s specification, not the inflation recommendation for your exact vehicle setup.
If you need a refresher on checking pressure correctly, see how to check tire pressure at home. Always compare your reading to the placard value when the tire is cold or as close to cold as practical.
Gauge accuracy, inflator duty cycle, and signs your roadside tools are not safe to use
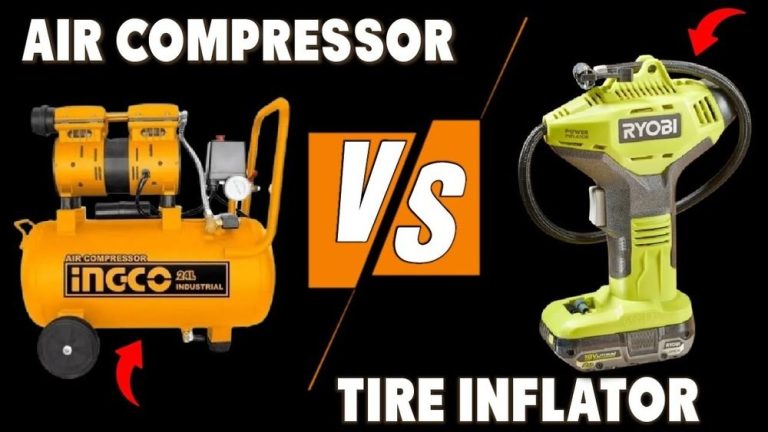
A cheap or damaged gauge can mislead you. If the reading seems odd, compare with a second gauge if you have one. Portable inflators also have limits. Some need a cool-down period after several minutes of use. A weak hose, cracked power plug, hot connector, or frayed cable is a sign to stop using that tool.
Can You Plug It, Inflate It, or Keep Driving? A Side-by-Side Comparison of Your Real Options

Most drivers are choosing between four real-world paths: drive carefully to a nearby shop, call roadside assistance, install the spare, or use a temporary repair method to reach professional service. The best choice depends on leak speed, location, tools, and where you are parked.
Driving slowly to a nearby tire shop vs calling roadside assistance vs using a spare
If the tire is still near recommended pressure and the shop is very close on local roads, a slow, careful trip may be reasonable. Roadside assistance is the better choice if the tire is clearly low, the route requires freeway speed, or you do not know how long the leak has been active.
A spare is often the best middle ground when conditions are safe enough for a tire change and the spare is properly inflated. Just remember that many modern vehicles have temporary spares with speed and distance limits, while some have no spare at all.
Tire plug kit vs sealant/inflator vs professional patch-plug repair
A basic plug kit can sometimes slow or stop a tread-area leak, but it is still considered a temporary roadside measure by many tire professionals. Sealant and inflator kits can help in some puncture cases, but they may not work on larger holes and can complicate cleanup for later service. For a broader look at temporary fixes, see do tire repair kits really work.
A professional patch-plug repair from inside the tire is usually the preferred fix when the puncture is in a repairable tread area and the tire has no hidden structural damage. That method lets the shop inspect the inside of the tire, which is important after any low-pressure event.
Which option fits commuters, highway drivers, trucks, SUVs, hybrids, EVs, and run-flat-equipped vehicles
Commuters on local roads may have the best chance of reaching a nearby shop if the leak is slow and pressure is still acceptable. Highway drivers should be more conservative because speed builds heat and reduces reaction time. Trucks and loaded SUVs should lean toward a spare or roadside help because the tire is carrying more stress.
Hybrid and EV drivers should check the owner’s manual before using sealant or lifting points for a spare change. Run-flat-equipped vehicles may allow limited continued driving, but only under the tire maker’s and vehicle maker’s conditions.
| Option | Best for | Owner consideration | Driver consideration |
|---|---|---|---|
| Drive slowly to shop | Slow tread leak and very short local trip | May save towing cost if pressure stays stable | Avoid freeway speeds and hard braking |
| Roadside assistance | Fast leak, unsafe location, or uncertain damage | May cost more now but can save the tire | Reduces roadside risk and blowout risk |
| Install spare | Drivers with a usable spare and safe work area | Check spare pressure and tool completeness | Follow spare speed and distance limits |
| Temporary plug or sealant | Emergency move to professional service | Not every puncture or tire type is a good candidate | Use only to reach repair, not normal driving |
When a Nail Is Repairable and When the Tire Should Be Replaced
Repairability depends on more than the fact that a nail caused the leak. Shops usually look at the puncture size, exact location, angle, and whether the tire was driven underinflated long enough to damage the inner liner or sidewall structure.
Professional-repair thresholds based on puncture size, angle, and location
In general, small punctures in the central tread area have the best repair odds. A straight puncture is usually more favorable than one that entered at an odd angle and tore more material. If the damage is too wide, too irregular, or too close to the shoulder, many shops will reject repair for safety reasons.
This is one area where shop policy can differ, but the common thread is simple: if the injury weakens a high-flex area or exceeds accepted repair limits, replacement is the safer answer.
Temporary-repair limits and why sidewall, shoulder, and large punctures usually fail inspection
Temporary plugs and sealants do not restore the tire to original condition. They are mainly there to help you get off the roadside or reach service. Sidewall and shoulder areas flex too much, which is why repairs there are often considered unreliable. Large punctures can also leave too much structural damage for a safe repair.
How prior damage, low-pressure driving, exposed cords, and uneven wear change the decision
If the tire was driven while nearly flat, the inside may show rubbing, heat damage, or broken structure. Exposed cords, bulges, cracking, severe uneven wear, or very low remaining tread can all push the decision toward replacement even if the nail itself looks minor.
TPMS, Sensors, and Relearn Limits After a Nail Puncture
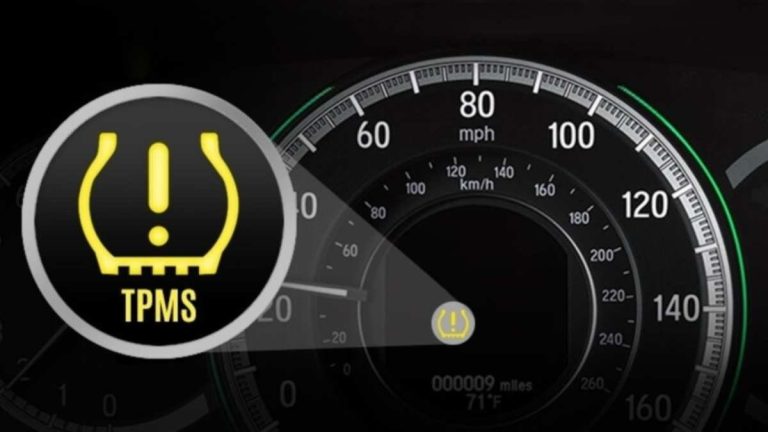
Your tire pressure monitoring system is helpful, but it is not a full tire diagnosis tool. It can warn you about pressure loss, yet it cannot confirm whether the puncture is repairable or whether the tire has internal damage.
What the TPMS warning can and cannot tell you about a slow leak
A TPMS light can tell you that one or more tires dropped below the system threshold. It cannot tell you if the leak is from a nail, valve stem, wheel damage, bead leak, or temperature swing. It also may not alert instantly for a very small leak.
If the light stays on after repair or tire service, the issue might be pressure-related, sensor-related, or relearn-related. For a related guide, see how to reset TPMS light after tire rotation.
Direct vs indirect TPMS, relearn limits, and when a sensor service kit may be needed
Direct TPMS uses pressure sensors in the wheels. Indirect TPMS estimates tire issues by comparing wheel-speed behavior through the ABS system. Direct systems can need a relearn after sensor replacement, wheel changes, or certain service procedures. Indirect systems may need recalibration through the vehicle menu.
During tire service, shops may also recommend a sensor service kit on direct systems. That can include small wear items such as seals or valve components, depending on the sensor design and service condition.
Why pressure should be set cold and rechecked with a reliable gauge after repair
Pressure rises as the tire warms up, so a hot reading can fool you into thinking the tire is properly inflated when it is not. After a repair, set pressure to the placard specification when the tire is cold, then recheck it with a dependable gauge over the next day or two to confirm the leak is gone.
Emergency Repair and Inflation: Correct Use, Electrical Limits, and Hybrid/EV Cautions
Portable inflators and emergency kits can help, but they have electrical and safety limits. If the 12-volt system is weak, the tool may not run properly or may overload a marginal outlet. Hybrid and EV owners should also be careful not to confuse the low-voltage system with the vehicle’s high-voltage traction system.
12-volt system voltage, battery state of charge vs battery health, and when low battery power becomes a stop condition
A portable inflator usually depends on the vehicle’s 12-volt system, whether the vehicle is gas, hybrid, or electric. A battery can show enough voltage to power accessories briefly and still be too weak under load. If the inflator slows badly, the outlet cuts out, or the vehicle shows low-voltage warnings, stop and reassess.
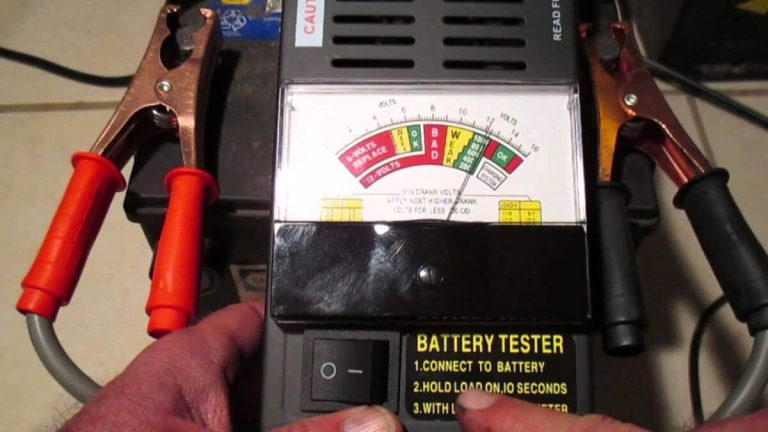
Battery state of charge is not the same as battery health. A charged but failing battery may still struggle with a high-draw inflator. If you suspect battery weakness, a proper battery test is more useful than guessing.
Correct connection order for inflators or portable power packs and current-limit concerns
Follow the inflator maker’s instructions exactly. Some units are designed for a 12-volt accessory socket, while others clamp directly to the battery. Using the wrong power source or extension setup can cause overheating, blown fuses, or poor performance. If you use a battery-connected inflator, keep cables clear of belts, fans, and hot engine parts.
Storage conditions, cable or pack condition, tool completeness, and post-use inspection
Heat, moisture, and long neglect shorten the life of emergency tools. After using an inflator or sealant kit, inspect the hose, connector, fuse, and power cable before putting it back in the vehicle. Replace missing caps, adapters, or damaged cords so the kit is ready next time.
If you are building or updating your roadside setup, it helps to review what should be in a roadside emergency kit before you need it on the shoulder.
Can an OBD2 Scanner Help with a Tire Warning? What It Covers and What It Does Not
An OBD2 scanner can sometimes help with tire-warning diagnosis, but only within limits. It is not a substitute for a pressure gauge, visual inspection, or professional tire evaluation. Some tools can read certain TPMS-related information on supported vehicles, while others cannot access that system at all.
Model-year and protocol coverage, port location, and the right ignition mode for basic scans
Most US-market vehicles have an OBD2 port under the dash, but scanner coverage varies by make, model year, and module support. A basic scanner may read engine codes only. More advanced tools may access body, ABS, or tire-related modules on some vehicles. The ignition usually needs to be in the correct mode for scanning, based on the tool and vehicle instructions.
Code and live-data limits for TPMS-related issues, emissions readiness, and reset limitations
Even when a scanner communicates with the vehicle, it may not show direct tire pressure values or allow TPMS resets. Many low-cost tools are focused on emissions-related diagnostics, not tire systems. Clearing codes also does not fix a puncture or refill a tire, and it can erase useful diagnostic clues if done too early.
App permissions, firmware updates, privacy considerations, and when tire diagnosis requires a professional
Bluetooth scan tools may ask for location, device pairing, account access, and app permissions. Review what the app collects and whether cloud storage is involved. Firmware and app updates can also affect feature support over time.
If your goal is just to understand scanner limits around tire warnings and basic diagnostics, the answer is usually simple: a scanner may help with system clues, but a nail-in-tire decision still depends on pressure, puncture location, and tire condition.
Cost, Legal Variation, and the Smart Next Step for U.S. Drivers in 2026
Your final decision is not only about safety. Cost, shop policy, warranty terms, and state inspection rules can affect whether repair is practical or whether replacement makes more sense. That is especially true when the tire is older, worn unevenly, or part of an all-wheel-drive setup that may require close tread matching.
Typical ownership cost: repair, replacement, towing, roadside service, and TPMS-related extras
Costs vary widely by tire type, wheel size, vehicle type, and where you live. A basic puncture repair is usually far cheaper than replacing a tire, but towing, roadside assistance, sealant cleanup, TPMS service parts, or replacing a damaged run-flat can change the math quickly. AWD vehicles may also face added cost if tread differences limit one-tire replacement.
Because prices change by region and retailer, it is smarter to compare local quotes than rely on a single national number. The key ownership question is whether spending less now increases the chance of buying a tire sooner.
Why state inspection rules, shop policies, and tire warranty terms can change your options
Some shops follow conservative repair rules and will not repair a tire another shop might inspect. Tire warranty terms can also exclude damage from underinflation, road hazards without coverage, or improper temporary repair use. State inspection and roadside equipment rules can vary too.
Practical next steps for CarValleyNJ readers: drive, inflate, swap, tow, or replace
If the nail is in the center tread, pressure is still close to spec, and a tire shop is only a short local drive away, you may be able to drive there slowly and carefully. If pressure is low, the tire is visibly deflated, the puncture is near the shoulder or sidewall, or the route requires highway speed, the safer move is roadside help, a proper spare, or a tow.
Think in this order: confirm pressure, inspect location, reduce speed, avoid long distance, and protect the tire from more low-pressure damage. In many cases, the best way to save money is to stop sooner, not push farther.
- Best for: Drivers who need a clear rule for deciding whether a nail puncture allows a short trip to a nearby shop or requires immediate roadside help.
- Think twice if: The tire is low, the puncture is in the shoulder or sidewall, the vehicle is heavily loaded, or the trip requires freeway speed.
- Next step: Check cold pressure against the door-jamb placard, leave the nail in place, and choose the shortest safe path to professional inspection or a tow.
Frequently Asked Questions
Sometimes, but only if the puncture is in the center tread, the tire still holds near the recommended pressure, and the shop is very close. If the tire is visibly low, losing air quickly, or the route requires highway speed, towing or a spare is safer.
No. The nail may be slowing the leak, and pulling it out can make the tire lose air much faster. Leave it in place until a tire shop inspects the tire.
In most cases, no. Sidewall and shoulder punctures are usually not considered safely repairable because those areas flex more and are more likely to fail inspection.
No. TPMS can warn you that pressure is low, but it cannot confirm puncture location, internal tire damage, or whether the tire meets repair standards. You still need a pressure check and a professional inspection.
Usually yes, if the inflator is designed for the vehicle’s 12-volt system and you follow the owner’s manual. Avoid high-voltage components and stop if the inflator, outlet, or battery system shows signs of overload or low-voltage trouble.
It varies by tire type, vehicle, and region. A simple repair is usually much cheaper than replacement, but towing, roadside service, run-flat replacement, TPMS parts, or AWD tread-matching issues can raise the total cost.